Preparing the Mold Surface for Fiberglass Application
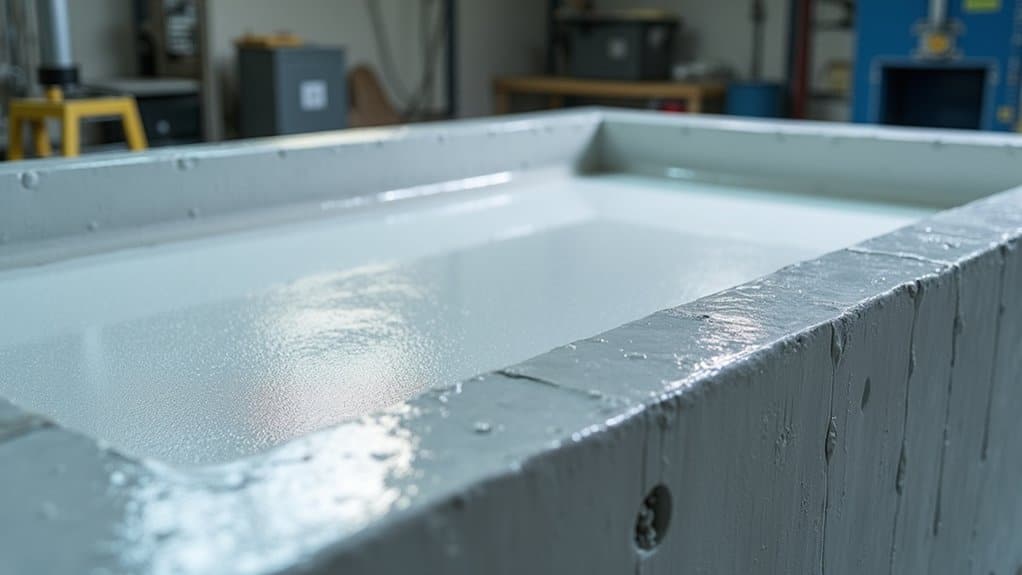
Before you apply any fiberglass to your pool shell mold, you’ll need to prepare the surface properly to guarantee clean releases and quality finished products. Proper mold preparation starts with cleaning, sand porous areas with 80 grit paper, then power wash and scrub with soap to remove all debris.
After cleaning, verify complete dryness using a condensation test. Next, apply Duratec Surfacing Primer at 10-15 mils to seal any porosity. Once sealed, polish the surface to a glossy, reflective finish using agents like Aqua Blue 100 and 200. Any defects in the gelcoat surface will transfer directly to your finished pool shell, so take extra care during this step.
For uniform wax application, apply three to five layers of Partall Paste #2, buffing each layer to a high shine. Be sure to buff within one minute of applying each wax layer to achieve optimal results. Finally, spray PVA release agent in multiple coats, achieving 2-4 mils thickness. This careful application of release agents ensures that the finished pool can be removed from the mold without damage to its structure or surface.
Applying the Gel Coat Layer for a Smooth Finish
With your mold surface properly prepared, waxed, and sealed with PVA release agent, you’re ready to apply the gel coat, the layer that’ll form your pool shell’s visible exterior surface.
Proper mold prep is everything, your gel coat’s flawless finish depends on it.
Mix your gel coat with 1-2% catalyst by weight, stirring continuously for 2-3 minutes to prevent air bubbles. Set your spray pattern to 6-8 inches wide with 50% overlap, maintaining 8-12 inches from the mold surface. HVLP spray guns are ideal for this application because they provide precise control and reduce material waste.
Timing gel coat application requires precision. Apply 4-5 layers at 5 mils each, waiting 15-20 minutes between coats. Using wet film thickness gauge, verify you’ve achieved 20-25 mils total. Work in sections, keeping edges wet to avoid cure lines between areas. Once you add MEKP hardener to your gel coat, you have approximately 20 minutes of working time before the material begins to harden.
Maintain shop temperatures between 65°F and 85°F with humidity below 50%. Your gel coat becomes tack-free within 45-60 minutes. The gel coat hardens through polymerization, creating a durable finish that will serve as the pool’s interior surface once complete.
Cutting and Positioning Fiberglass Mat Sheets
Once your gel coat reaches the tack-free stage, you’ll need to work quickly to position your fiberglass reinforcement before the layup window closes.
Pre-cut all chopped strand mat sheets before mixing resin. Use quality scissors for straight edges or apply tearing techniques along a straight edge to create feathered junctions. Feathered edges eliminate hard lines and produce seamless overlaps during material placement. For pool shell construction, chopped strand mat 1.5 oz. weight provides excellent conformability to complex contours while building adequate thickness.
| Tool | Best Application |
|---|---|
| Quality scissors | Woven roving, straight cuts |
| Straight edge + tear | Chopped strand mat, feathered edges |
| Razor knife | 1708 biaxial, precise widths |
| Fiberglass wheel | Complex curves, radius cuts |
Position mat sheets with overlapping edges, staggering seams to maintain consistent laminate thickness. Cut pleats into woven roving when fitting around pool radii or plumbing penetrations. Hang excess material over edges for lip formation. When working with woven roving, always start the layup with a mat layer for better bonding to the substrate.
Mixing Resin and Catalyst in Proper Ratios
Your pre-cut fiberglass sheets won’t bond properly without correctly catalyzed resin, and getting this ratio wrong ranks among the most common layup failures.
Understanding catalyst ratio types is essential for pool shell work. Standard polyester resins require 1-2% MEKP catalyst by weight, while ISO gelcoats need 1-2% using LBI-321 MEKP. Never drop below 1%, incomplete curing will safeguard your shell’s structural integrity.
Catalyst temperature effects directly impact your working time. On cooler days (55-60°F), use mid-to-high range ratios around 2%. Warmer conditions (75-90°F) demand lower ratios near 1% to preserve adequate gel time. Be aware that direct sunlight on substrates will further accelerate the curing process and reduce your available working window. Fiberglassing below 50°F is not recommended, so always warm your resins and materials to room temperature before beginning work.
Measure precisely using graduated cups or pipettes. Add catalyst to resin and mix thoroughly for one minute in a well-ventilated area. Prepare all materials beforehand, you’ll maximize pot life and guarantee consistent saturation across your fiberglass mat.
Rolling Out Air Bubbles During Wet Layup
Trapped air bubbles compromise your pool shell’s structural integrity and create weak points that lead to delamination, so removing them during wet layup isn’t optional, it’s critical.
Use paddle rollers to drive out air while ensuring complete fiber saturation. Metal rollers work particularly well for preventing air pockets from forming in fiberglass layers. When troubleshooting bubble removal, apply brushes at an angle with smooth pushing motions to work fabric into the resin effectively.
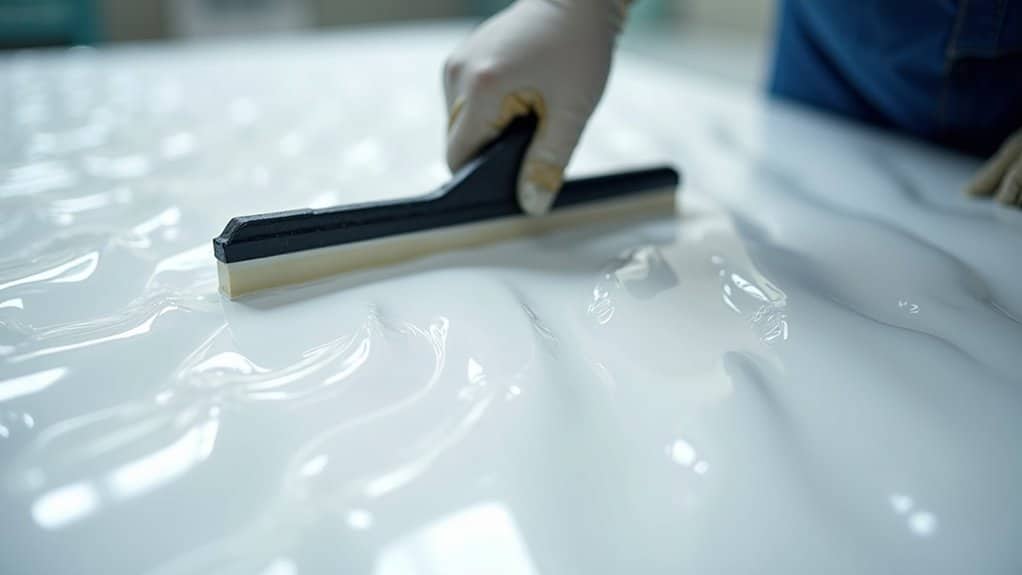
For improving layup efficiency, use plastic squeegees on poly-covered layups to purge excess epoxy and bubbles simultaneously. Heat guns disperse surface bubbles on epoxy layers without gelcoat. Don’t rush this process, insufficient saturation leads to pinholes and voids. Using continuous glass fibres rather than randomly oriented fibres can increase impact strength by 17%-24%, providing additional structural resilience in your pool shell. Take time to achieve full wet-out on each layer before proceeding, as shortcuts inevitably create defects requiring costly repairs. Mastering this technique requires significant trial and error, so practicing on test samples before working on your actual pool shell will help you develop the experience needed for pinhole-free results.
Building Up Multiple Fiberglass Layers for Structural Strength
You’ll need to understand how layer thickness, resin saturation, and curing intervals work together to build a structurally sound pool shell. Each fiberglass layer must achieve proper thickness while maintaining complete resin saturation to prevent dry spots that compromise strength. Guaranteeing adequate curing time between applications safeguards each layer bonds correctly before you add the next, creating the cumulative structural integrity your pool shell requires. With proper maintenance, your completed pool shell can achieve a lifespan of 25-30 years, making the careful attention to layup techniques a worthwhile investment. The resulting non-porous surface resists algae attachment and significantly reduces the cleaning time required to maintain your pool. When combined with JUSHI E6-CR glass fibre, high-quality Vinyl Ester resin creates exceptional corrosion resistance and strength in the laminate structure.
Layer Thickness Requirements
Building up a fiberglass pool shell to proper thickness requires multiple precisely applied layers, each serving a distinct structural purpose. You’ll apply gelcoat at 0.8mm to 1.0mm, followed by vinyl ester resin with glass fiber at 1.5mm to 2.0mm for corrosion resistance. Subsequent polyester resin layers add structural solidity when you roll them properly to eliminate air pockets. Honeycomb materials are incorporated between layers to provide additional strength and support throughout the shell structure.
Tolerances during layup demand strict attention, most manufacturers target 3/16″ to 3/8″ total thickness. You must maintain consistent application across all surfaces, with extra reinforcement at rounded corners. The impact of improper layering proves significant: shells thinner than 5/16 inches risk cracking under soil and water pressures. Quality construction requires minimum 48 oz per square yard of woven roving at stress points, ensuring your shell achieves ideal strength-to-flexibility ratios.
Resin Saturation Techniques
Achieving proper layer thickness means little if your resin saturation falls short, air pockets and dry spots create weak points that fail under pressure. Catalyzing resin viscosity correctly guarantees workable flow rates for complete fiber penetration. Pour resin over your 1.5 oz chop strand mat like carpet, then roll systematically to eliminate bubbles and achieve uniform distribution.
Maintaining saturation consistency requires wet-on-wet application, lay your second mat while the first remains wet, saturating immediately with polyester or vinyl ester resin. Use squeegees and spreaders to work resin into mat fibers thoroughly. Roll each layer smooth before proceeding.
Premium vinyl ester resin provides superior osmosis protection, while cheaper polyester options risk blistering from water molecule penetration. Un-filled resin preserves structural integrity better than filled variants.
Curing Between Applications
While wet-on-wet application works for consecutive mat layers, curing between major applications builds the structural foundation your pool shell needs to withstand decades of water pressure.
You’ll cure each chopped fiberglass layer before applying the next, repeating this process up to five times. Ideal curing temperatures and proper humidity control guarantee complete chemical solidification, preventing delamination and blistering that shorten pool lifespan.
Your gelcoat must cure fully before you apply the initial vinyl ester barrier layer. After this first fiberglass application cures, you’ll add subsequent polyester resin layers, inserting hand-laid reinforcements at corners between curing cycles. Woven roving goes onto cured base layers at stress points, while honeycomb core strips integrate between your third and fourth layers.
Allow minimum 24-hour curing in the mold before demolding.
Incorporating Reinforcement Ribs and Structural Supports
Because fiberglass pool shells must withstand opposing forces, water pressure from inside and soil pressure from outside, manufacturers integrate reinforcement ribs and structural supports throughout the layup process. You’ll find integrating supporting structures requires precise placement during wet layup stages, guaranteeing critical regions where stress concentrates.
Key reinforcement components include:
- Honeycomb structural comb forms ribs beneath steps, benches, and sidewalls to prevent bulging
- Woven roving layers applied at break lines where walls meet the floor for controlled flexibility
- Maxi-rib systems providing foundation support with ceramic composite cores three times standard thickness
- GFRP rebar offering twice steel’s tensile strength for shells requiring additional reinforcement
After positioning supports, you’ll apply a final polyester resin layer, working out air bubbles to secure complete encapsulation.
Curing the Fiberglass Shell Under Controlled Conditions
Proper curing transforms wet layup into a rigid, watertight pool shell, and this process demands strict environmental control. You’ll need to maintain ideal temperature and humidity levels throughout the curing phase. Factory settings allow you to guarantee these environmental conditions precisely, preventing defects that outdoor exposure would cause.
Catalyst monitoring proves essential during this stage. You’ve already applied a specially blended catalyst to control the gelcoat’s setting speed, and now you must verify it’s hardening correctly. The shell should cure in the mold for at least one full day before removal.
Temperature fluctuations will delay hardening, while uncontrolled humidity creates laminate defects. Full curing typically takes several days depending on material thickness and ambient conditions. Don’t rush this process, complete curing assures structural integrity and proper mold release.
Trimming and Finishing Raw Edges of the Pool Shell
After the fiberglass shell cures and releases from the mold, you’ll need to trim the overlay, excess material that hangs off the edges, using mechanical cutting methods to achieve clean, uniform perimeters. Once you’ve removed the bulk material, sand the raw edge surfaces smooth to eliminate sharpness and irregularities that could compromise coping attachment or cause injury during installation. You’ll then seal the exposed fiberglass ends to protect against moisture intrusion and prevent osmotic blistering that can degrade structural integrity over time.
Cutting Excess Fiberglass Material
Once the pool shell has cured for at least one day and you’ve removed it from the mold, you’ll need to trim the scraggly overlay material that extends beyond the shell’s intended edges.
Protective equipment requirements include safety glasses, dust-rated mask, and earmuffs before beginning any cutting operation.
For effective edge profiling techniques, follow these steps:
- Select a grinder with a large disc, the larger diameter cuts faster due to superior rotation dynamics.
- Approach the edge from the side, keeping the blade flat against the material to guarantee no wobbling.
- Maintain consistent blade depth as you run along the shell’s perimeter.
- Hand sand the final 0.5mm with a block tool to achieve a crisp, clean profile.
This process verifies precise boundaries before quality inspection.
Sanding Edge Surfaces Smooth
Smoothing out the raw edges of your pool shell requires a systematic approach to sanding that progresses from coarse to fine grits. Start with 80-grit sandpaper at 45-degree angles to remove material evenly, then switch to 120-grit using circular motions. Your sanding techniques should include progressive sanding through 220-grit with light, linear strokes parallel to the edge.
For the final pass, use 320-400 grit with an orbital sander at low speed to achieve a smooth finish. Feather your edges into adjacent gelcoat surfaces to eliminate visible sanding lines.
Between each grit stage, remove dust with tack cloths or compressed air. Inspect your work under bright LED lighting to detect remaining scratches or high spots before proceeding to finishing compounds.
Sealing Raw Edge Ends
Because raw fiberglass edges remain highly porous and vulnerable to moisture infiltration, sealing them properly is critical to preventing delamination and osmotic blistering in your pool shell. You’ll need polyester or epoxy resin sealants compatible with your laminate, mixed at a 1:1 ratio with hardener and applied in thin coats along trimmed edges.
To achieve effective edge sealing and mitigating delamination:
- Apply 2-inch polyester masking tape 1/4 inch from raw edges to establish precise sealant boundaries
- Brush catalyzed sealant with 1-2% MEKP promoter for 15-30 minute gel time
- Guarantee 100% edge saturation to block water ingress completely
- Cure at 70-80°F for 24 hours minimum before water exposure
Repairing hairline cracks immediately prevents moisture penetration that compromises structural integrity.
Inspecting and Quality Testing the Completed Fiberglass Shell
After the final cure cycle completes, you’ll need to conduct a thorough visual inspection of the entire shell surface before any other testing begins. Use bright light and magnification to check for cracks, blisters, or delaminations. Perform tap tests across the surface, a clear, bell-like sound indicates proper lamination, while dull thuds reveal air voids requiring repair.
Next, apply NDT imaging techniques including ultrasonic thickness gauging and thermography scans to map subsurface defects. Verify wall thickness uniformity falls within 1/4 to 3/8-inch specifications using calibrated gauges.
For destructive testing methods, cut edge samples for cross-section microscopy and conduct Barcol hardness tests, requiring minimum 35-45 readings. Complete hydrostatic testing at 1.5 times design pressure for 24 hours. Document all results to confirm NSF/ANSI 50 certification compliance before shipping.
Frequently Asked Questions
How Long Does a Completed Fiberglass Pool Shell Typically Last?
A completed fiberglass pool shell typically lasts 25-30 years, with well-maintained installations exceeding 50 years. Your shell’s structural integrity depends on proper layup techniques, multiple fiberglass and resin layers create a flexible, crack-resistant structure. Key longevity considerations include maintaining chemical balance, avoiding complete drainage, and addressing gel coat damage early. You’ll find fiberglass outlasts vinyl liners and requires less refinishing than concrete, making it a durable, cost-effective choice.
Can Fiberglass Pool Shells Be Repaired if Damaged During Transportation?
Yes, you can repair fiberglass pool shells damaged during transportation. Start by reinforcing damaged areas with marine-grade bond coat and fiberglass cloth layered over the prepared surface. For addressing structural integrity, you’ll use polyester putty or A&B watertight bond mix on deeper cracks. Sand the area smooth, apply UV-resistant gel coat, and allow full curing before refilling. Professional assessment is recommended for extensive damage to guarantee lasting results.
What Temperature Range Is Ideal for Fiberglass Pool Shell Manufacturing?
You’ll achieve the best results when maintaining an ideal ambient temperature between 65-77°F (18-25°C) during the layup process. The perfect curing temperature guarantees your gelcoat and resin catalyze properly, preventing defects and securing shell integrity. You should control humidity levels alongside temperature, as both factors directly impact curing speed and material strength. Consistent factory conditions help you meet weight specifications within 5% while producing structurally sound pool shells.
How Much Does a Standard Fiberglass Pool Shell Weigh When Finished?
A standard 28 by 14 foot fiberglass pool shell weighs approximately 3,000 pounds when properly constructed. You’ll find weight varies directly with dimensions and material thickness, typically measuring ⅜ inches across six layers. Your estimated material cost increases with heavier, quality shells since they contain more fiberglass and resin. During average installation time planning, you must verify the shell falls within 5% of design specifications to confirm construction integrity.
Are Fiberglass Pool Shells Customizable in Color and Size Options?
Yes, you can customize fiberglass pool shells with custom gelcoat finishes and a wide range of size options. You’ll choose from Standard Galaxy Finishes in 5 colors or Premium Galaxy Finishes offering 13 colors, including options that affect water appearance and heat retention. However, shells max out at 16 ft. by 40 ft. due to highway transport limits. You can’t alter depths or create ultra-custom shapes since manufacturers use fixed molds.