The Role of Catalysts in Fiberglass Resin Curing
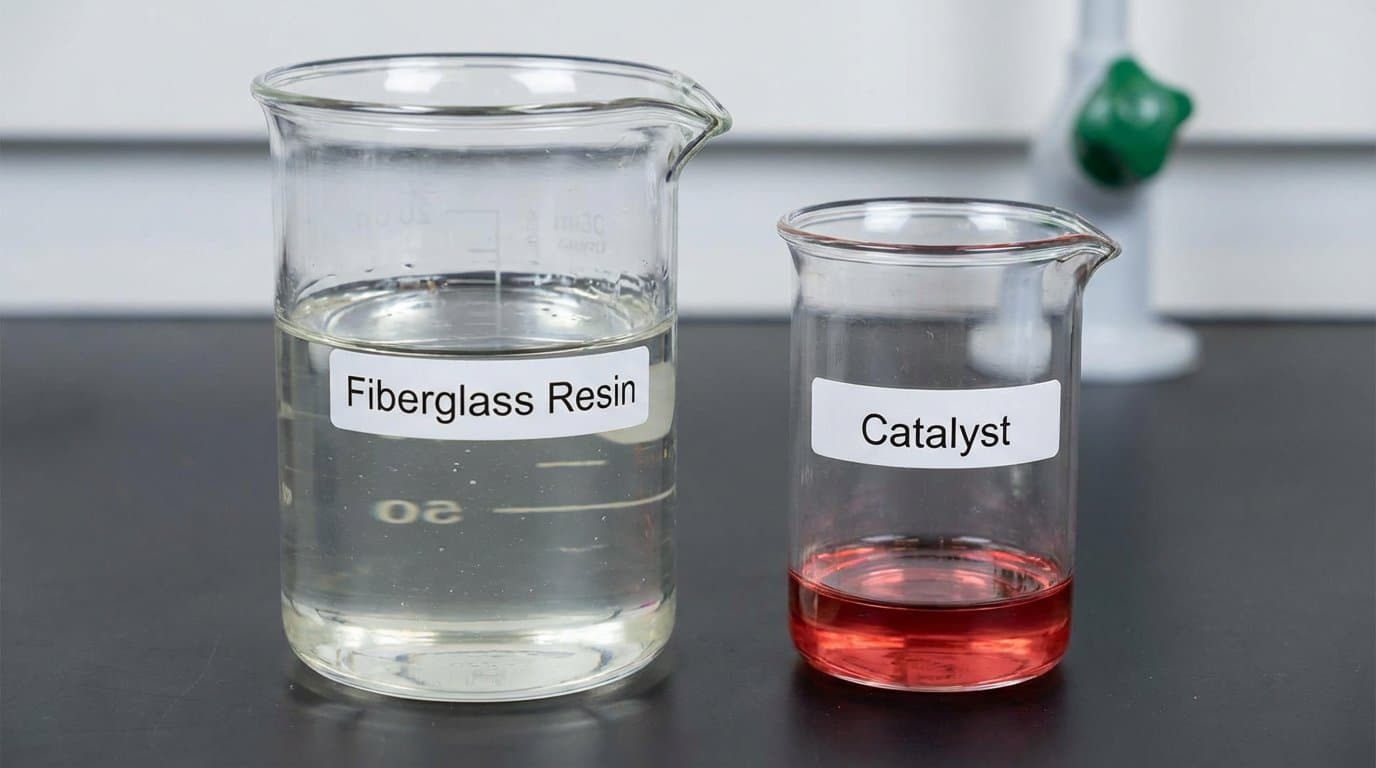
Catalysts drive the chemical transformation that converts liquid fiberglass resin into a rigid, durable solid for pool fabrication. You’ll typically use organic peroxides like methyl ethyl ketone peroxide (MEKP) or benzoyl peroxide to initiate polymerization. These catalysts overcome the inhibitors added during manufacturing that prevent self-curing, a critical factor in resin storage requirements.
When you add catalyst, you’re triggering an irreversible cross-linking reaction. Without proper catalyst addition, your laminate won’t cure correctly, compromising structural integrity. MEKP functions as an oxidizer, making catalyst safety considerations essential. Always consult safety data sheets before handling.
You must mix thoroughly for approximately one minute to guarantee even distribution. The resin’s color change indicates reaction initiation with cobalt promoters already present in the formulation. The standard mixture requires a 1-4% catalyst ratio by volume to achieve proper curing results. Styrene is the most common monomer used as a cross-linking agent in these polyester resin formulations. After the final layer is applied, the pool shell must be cured in the mold for at least a day to ensure complete polymerization and structural stability.
Understanding Thermoset Resins and Their Irreversible Properties
Thermoset resins form the structural backbone of fiberglass pool fabrication, undergoing an irreversible chemical transformation that distinguishes them from thermoplastic materials. When you initiate curing, cross-linked polymer networks lock into permanent molecular structures that won’t remelt under heat. This irreversibility eliminates coating adhesion challenges common with thermoplastics while ensuring decades of structural integrity.
| Property | Thermoset Advantage |
|---|---|
| Heat Resistance | Maintains shape above 30°C |
| Moisture Stability | Prevents osmotic blistering |
| Structural Permanence | No delamination risk |
| Chemical Resistance | Withstands pool chemicals |
| Longevity | Decades without resurfacing |
You’ll need precise resin viscosity adjustments during application to achieve ideal layer bonding. Once cured, epoxy vinyl ester and isophthalic polyester layers deliver thermal insulation values between 0.04-0.07 W/m·K with superior corrosion resistance. Vinyl ester resin provides greater flexibility under pressure, allowing the pool shell to accommodate ground movement and temperature fluctuations without developing cracks. The resin you select directly impacts water resistance, surface smoothness, and overall pool lifespan, making this choice critical during the fabrication process. The resin functions as the binding agent that holds fiberglass layers together, directly determining the pool’s strength, durability, and aesthetic quality throughout its service life.
Vinyl Ester Resin Applications for Water Resistance
When you’re fabricating fiberglass pools, vinyl ester resin‘s tightly cross-linked polymer structure creates a hydrophobic barrier that prevents osmotic blistering, a common failure mode in polyester-laminated pools exposed to constant water immersion. You’ll achieve superior blister prevention by applying vinyl ester as a skin coat, where its low water absorption rate and tortuous resin-fiber path block moisture from penetrating into the underlying laminate layers. This skin coat application leverages vinyl ester’s enhanced adhesion properties to bond securely with subsequent polyester layers while maintaining the chemical resistance needed for chlorinated pool environments. The cured resin forms seamless monolithic layers that preserve structural integrity throughout the pool’s service life. Vinyl ester’s excellent corrosion resistance to water, solvents, and alkalis makes it particularly well-suited for prolonged exposure to chemically treated pool water. The resin’s thermal stability ensures the pool shell maintains its integrity despite temperature fluctuations from solar heating and cool water refills.
Blister Prevention Properties
Vinyl ester resin delivers superior blister prevention in pool fabrication through its unique molecular architecture and hydrophobic characteristics. You’ll achieve water absorption optimization with rates typically under 1.5% by volume, considerably outperforming polyester alternatives. The tightly cross-linked polymer network eliminates pores and voids that create water pathways, while end-capped molecular structures reduce vulnerable ester bond density by 35, 50%. This resistance to saltwater osmosis makes vinyl ester particularly effective at preventing blister formation compared to polyester in demanding aquatic environments.
| Property | Vinyl Ester Performance |
|---|---|
| Water Absorption | Under 1.5% by volume |
| Ester Bond Reduction | 35, 50% vs polyester |
| Maintenance Savings | 40% over decade |
Your pool shell gains thermal stress resistance through low crosslink density that maintains hydrophobic barriers under temperature fluctuations. High elongation properties allow the cured resin to flex under pressure, preventing stress-induced blisters while methyl groups provide steric hindrance against water attack. This thermosetting resin derived from epoxy and methacrylic acid creates a highly crosslinked polymer that ensures long-term structural integrity in aquatic applications.
Skin Coat Benefits
Building on these blister prevention properties, the skin coat layer serves as your pool’s primary defense against moisture infiltration and structural degradation. Vinyl ester resin creates an impermeable barrier that prevents water absorption, delivering superior moisture resistance benefits compared to standard polyester alternatives.
You’ll achieve enhanced gel coat adhesion when applying vinyl ester to your skin coat. This formulation guarantees uniform bonding across fiberglass layers while minimizing surface imperfections. The color retention advantages stem from vinyl ester’s chemical and UV resistance, preventing yellowing and maintaining vibrant gloss under prolonged exposure. Lower-quality resins can lead to osmosis damage, surface imperfections, and expensive repairs that compromise your investment.
The resin’s high elongation properties allow your pool shell to flex under ground shifts and temperature fluctuations without cracking. This flexibility reduces stress fractures and extends structural longevity, lowering your long-term maintenance requirements while preserving surface integrity for decades. Aviva Pools backs their vinyl ester construction with an industry-leading warranty that demonstrates confidence in their manufacturing quality.
Isophthalic Polyester Resin for Structural Strength
Several key molecular characteristics distinguish isophthalic polyester resin from standard orthophthalic formulations, making it the preferred choice for pool shell fabrication requiring maximum durability. The molecular architecture incorporates additional aromatic rings and a higher degree of crosslinking, delivering 10% greater flexural strength and 20% higher tensile strength than orthophthalic alternatives. Beyond mechanical performance, isophthalic resins offer substantially better chemical resistance than their orthophthalic counterparts.
You’ll achieve superior process efficiency through isophthalic resin’s enhanced adhesion to glass fibers, reducing material usage by 10% or more during hand lay-up and spray-up applications. The resin’s low viscosity of 600 cps and thixotropic index of 2.0 enable precise vertical application on pool shells.
For structural layers, NPG-containing isophthalic variants minimize hydrolysis sensitivity in high-moisture environments. The formulation meets NSF-14 and MIL-R-7575C standards, ensuring your pool structure maintains chemical resistance and dimensional stability throughout its service life. This makes isophthalic resin ideal for swimming pool construction, as it provides superior resistance to water and harsh chemical exposure compared to orthophthalic alternatives.
Temperature and Humidity Control During the Curing Process
You’ll achieve ideal curing results by maintaining resin temperatures between 70°F and 85°F, as temperatures below 60°F extend cure times from 24 hours to 72 hours and risk incomplete polymerization. Humidity control proves equally critical, moisture in the air prevents full cure, compromising the pool shell’s structural integrity and long-term durability. Implementing dry air systems, monitoring ambient conditions, and preheating your workspace guarantees consistent bonding strength throughout the fabrication process.
Optimal Curing Temperatures
When curing fiberglass resin for pool fabrication, maintaining workspace temperatures between 70°F and 85°F (21°C to 29°C) guarantees conducive chemical reactions and proper hardening. You’ll need to account for resin viscosity adjustments when temperatures drop below this range, as cold conditions thicken the material and impede application.
Below 60°F, curing slows dramatically, risking incomplete hardening. At 60°F-65°F, your standard 24-hour cure extends to 72 hours. Thermal cycling considerations become critical if temperatures fluctuate during the curing window, you must keep your workspace above 60°F throughout the entire process.
For vinyl ester and polyester resins, you can compensate for lower temperatures around 77°F by increasing catalyst levels, which improves cure degree in thin panels. Preheat materials using indirect methods like warm baths, reaching up to 85°F without direct heat exposure.
Humidity Impact on Strength
Relative humidity above 60% directly undermines the curing process by interfering with the exothermic free radical polymerization that hardens your fiberglass resin. Moisture permeation into uncured layers creates void defects that compromise structural integrity. You’ll experience reduced fiber-to-resin bond strength and lower tensile properties when curing under humid conditions.
| Humidity Level | Curing Effect | Strength Impact |
|---|---|---|
| Below 40% | Ideal curing | Maximum bond strength |
| 40-60% | Acceptable curing | Adequate mechanical properties |
| 60-70% | Extended cure time | Reduced laminate strength |
| 70-80% | Incomplete polymerization | Significant weakness |
| Above 80% | Failed cure | Structural compromise |
Control your workspace humidity using dehumidifiers before and during application. Monitor conditions continuously throughout the curing cycle to maintain consistent cross-linking and prevent moisture-related degradation.
Controlled Environment Benefits
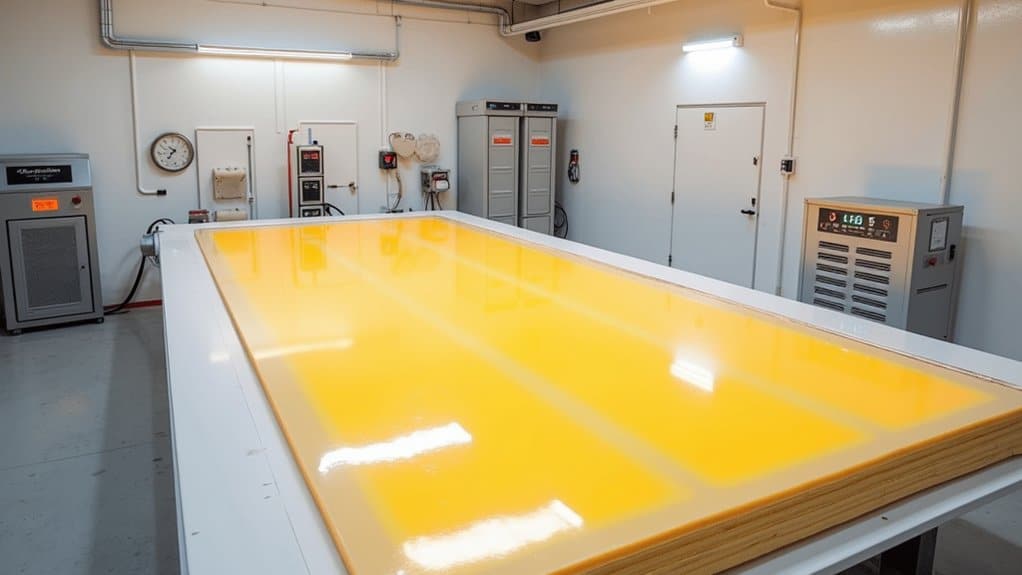
Maintaining precise environmental control throughout the curing process delivers measurable improvements in fiberglass pool quality and structural performance. You’ll achieve the desired results when facility temperatures stay between 70°F and 85°F, with 77°F representing the ideal spraying temperature for gelcoat and resins.
Controlled air flow serves two critical functions: it dissipates heat generated during the exothermic polymerization reaction and maintains consistent ambient conditions across the entire mold surface. You’ll prevent localized hot spots that compromise cure uniformity.
Humidity monitoring guarantees moisture doesn’t contaminate resin layers during application or curing. Dry compressed air eliminates water introduction, supporting complete chemical bonding between fiberglass layers. When you maintain these specifications, curing times remain predictable at 24 hours rather than extending to 72 hours. The result is maximum structural strength and enhanced chemical resistance.
Optimal Curing Times for Fiberglass Pool Shells
Although manufacturers may vary slightly in their protocols, fiberglass pool shells require a minimum of 24 hours in the mold before removal to certify complete polymerization. Gelcoat layers typically need 24 to 48 hours to achieve full hardness, with catalyst blends specifically formulated to control curing speed. You’ll find that shell strengthening depends directly on maintaining controlled temperature and humidity throughout the process.
The demolding process occurs only after fiberglass reaches complete cure. Key factors affecting your curing timeline include:
- Temperature fluctuations that accelerate or slow resin hardening
- Humidity levels that impact polymerization rates
- Specific catalyst ratios blended into gelcoat formulations
When you remove the shell prematurely, you risk structural weakness and surface defects. Proper curing verifies smooth mold release and produces shells ready for trimming and quality inspection.
Chemical Reactions That Transform Liquid Resin to Solid Composite
When you add MEKP catalyst to polyester or vinylester resin, you trigger an irreversible thermoset reaction that transforms the liquid into a permanent solid state. This exothermic process generates heat as polymer chains form cross-linked molecular networks, creating the rigid glass-like composite structure essential for pool shell durability. You can’t reverse this chemical transformation once complete, which is why precise catalyst ratios and controlled curing conditions determine your final product quality.
Catalyst Initiates Solidification
The transformation from liquid resin to solid composite begins the moment you introduce a catalyst into the polyester or epoxy system. Your catalyst selection determines the reaction’s time-temperature profile. MEKP serves as the standard catalyst for polyester fiberglass resins, enabling room-temperature cure without external heating equipment.
The catalyst initiates cross-linking by connecting monomer molecules into expanding polymer networks. Consider these critical parameters:
- Resin-to-hardener ratio directly influences the gelation point
- Amine curing agents open epoxy rings to start chain extension
- Functionality values of resin and hardener determine gelation degree
Heat generation impact becomes significant as bonds form. The exothermic reaction releases 120°F-180°F for epoxy systems and exceeds 220°F for polyester. This heat byproduct accelerates further reaction, creating a self-reinforcing cure cycle you must monitor carefully.
Thermoset Irreversibility Process
Once cross-linking kicks off, your resin undergoes an irreversible transformation that permanently locks the composite into its final geometry. You can’t reverse this chemical reaction, the polymerization drives continuous degree of cure progression from liquid to solid state.
During curing, you’ll observe distinct phases. Initially, viscosity fluctuations impact your working window as the resin drops then rises before gelation. At approximately 0.5-0.6 degree of cure, gelation converts your liquid into a rubbery gel. Continued reaction advances the glass transition temperature until vitrification occurs, producing a rigid, glassy solid.
Commercial epoxy systems typically achieve 0.85-0.95 final cure levels. If you don’t reach proper cure thresholds, you’ll encounter soft spots, reduced chemical resistance, and compromised mechanical properties. Post-curing at heightened temperatures can correct these deficiencies.
Cross-Linking Polymer Chains
Cross-linking transforms your liquid resin into a rigid composite through three distinct chemical stages that build molecular architecture from the ground up. First, monomer chemistry drives polymer chain formation as short molecules link into longer linear structures through addition reactions. Your curing agent then initiates the second stage, where reactive sites on crosslinking molecules bond to adjacent polymer chains.
During the third stage, exothermic cross linking generates substantial heat as covalent bonds create an interconnected three-dimensional network. This infinite molecular structure restricts chain mobility and delivers enhanced rigidity.
- Chain formation: Linear polymers grow as monomers react during initial curing
- Network bridging: Crosslinks connect adjacent chains at reactive sites
- Property development: Higher crosslink density increases temperature stability and chemical resistance
This molecular transformation determines your pool shell’s structural integrity.
Layering Techniques and Their Impact on Cure Quality
Achieving ideal cure quality in fiberglass pool fabrication depends directly on how you sequence and apply each resin-saturated layer. You’ll start with gelcoat application, which cures under controlled conditions before any fiberglass touches the mold. Your first chopped layer uses 100% vinyl ester resin, creating a watertight barrier that prevents moisture from compromising subsequent polyester layers.
Zonal reinforcement strategies come into play when you apply woven roving at stress points where sidewalls meet the floor. You’ll alternate weave directions between mat layers to optimize tensile strength while accounting for thermal expansion considerations in high-movement areas. Each layer requires thorough rolling to eliminate air bubbles and guarantee even saturation.
Your minimum five hand-laid layers must cure at least one day in-mold, achieving maximum hardness and blister resistance through proper sequencing.
Preventing Air Pockets and Imperfections During Solidification
Air entrapment during resin solidification creates structural weak points that compromise your pool’s longevity and watertight integrity. You’ll need to implement rigorous surface preparation methods before applying any resin layers. Clean substrates thoroughly to remove contaminants, and guarantee all solvents evaporate completely to prevent de-gassing during cure.
Air bubbles trapped in curing resin become permanent weak spots that threaten your pool’s structural integrity and waterproofing.
Your mixing consistency control directly affects bubble formation. Measure components precisely and stir methodically, scrape container sides and bottom without introducing excess air through vigorous motion.
During application, follow these critical steps:
- Apply a thin seal coat first to expel trapped air from porous surfaces
- Limit each layer to 1/8 inch thickness to prevent exothermic overheating
- Use a paddle roller after foam application to consolidate laminate and force out remaining air
Pass a heat gun briefly over wet surfaces to vent residual bubbles.
Quality Inspection Methods After the Curing Process
Once your fiberglass laminate has completed its cure cycle, systematic quality inspection determines whether the finished pool shell meets structural and chemical resistance specifications. You’ll begin with visual examination, checking for surface imperfections, entrapped air bubbles, and dimensional accuracy against design tolerances.
For cure verification, perform the Barcol hardness test per ASTM D 2583, comparing readings against manufacturer specifications. The coin tap test identifies under-cured areas producing dull sounds, while acetone wipe tests reveal incomplete polymerization through surface tackiness.
Non destructive inspection techniques include thermography for detecting thermal variations and phased array ultrasonic testing for internal structure assessment. When deeper analysis becomes necessary, analytical testing methods such as differential scanning calorimetry determine glass conversion temperature, while thermogravimetric analysis quantifies resin content. You’ll cut test samples at least one inch from edges to maintain accurate resin-to-glass ratio measurements.
Frequently Asked Questions
Can I Swim in My Fiberglass Pool Immediately After Installation?
You shouldn’t swim in your fiberglass pool immediately after installation. You’ll need to wait for proper curing duration, which typically ranges from three to seven days depending on resin composition factors like hardener ratios and ambient temperature conditions. During this period, VOCs off-gas from the gel coat and resin layers. Before entering, you must verify complete curing, conduct water chemistry testing, and guarantee all safety inspections meet local building code specifications.
How Long Will a Properly Cured Fiberglass Pool Shell Last?
A properly cured fiberglass pool shell typically lasts 25 to 50+ years, with high-quality shells exceeding 50 years. Your pool’s longevity depends on proper installation considerations, including structural integrity and manufacturer specifications. Environmental factors affecting lifespan, such as soil conditions, climate, and UV exposure, also play critical roles. You’ll maximize durability by maintaining pH levels at 7.2, 7.6, alkalinity at 80, 120 ppm, and calcium hardness at 200, 400 ppm throughout operation.
Does Gelcoat Color Affect the Curing Process or Pool Durability?
Gelcoat color doesn’t affect the curing process or pool durability. You’ll find that color saturation and surface finish depend on your application technique, not pigment properties. Color separation issues stem from improper spray methods, excessive thinning, or thick per-pass application, not the color itself. Your pool’s structural integrity relies on proper catalyzation rates, temperature control between 60-80°F, and maintaining minimum 15 mils thickness regardless of which color you’ve selected.
What Happens if My Fiberglass Pool Cracks After Curing?
If your fiberglass pool cracks after curing, you’ll need to assess the damage type and severity. Causes of post curing cracks** include ground movement, temperature-induced expansion, manufacturing defects, or improper installation stress. Potential remedies for cracked shells depend on crack depth, surface spider cracks require sanding, marine-grade bond coat application, and gelcoat finishing. You’ll reinforce deeper damage with fiberglass cloth and polyester putty. Structural cracks exposing fiberglass strands** demand professional intervention.
Can Cured Fiberglass Resin Be Repaired if Damaged Years Later?
Yes, you can repair cured fiberglass resin damaged years later. You’ll need proper patch application techniques, sand progressively through 80-400 grit, degrease with acetone, then apply catalyzed resin with fiberglass cloth extending 2-3 inches beyond the damage. Address chemical compatibility concerns by using marine-grade polyester filler and matching gelcoat. Allow 24-48 hours for full cure, with 72 hours ideal before refilling your pool.