Both vinyl liner and fiberglass DIY pool installations can save you 40-50% on costs, but they require significant technical expertise. You’ll need specialized equipment like excavators and laser transit levels, plus knowledge of soil mechanics, plumbing, and local building codes. Vinyl liner offers more flexibility in design but demands precise wall installation, while fiberglass shells provide quicker installation but require heavy lifting equipment. Understanding the intricacies of each method will help determine if you’re equipped for this challenging project. A ground pool installation comparison should factor in long-term maintenance, vinyl liners may need replacing every 5, 10 years, while fiberglass pools last longer with less upkeep. It can also highlight resale value and regional preferences that may guide your choice.
Key Takeaways
- Vinyl liner pools offer more DIY-friendly installation with simpler tools and techniques, while fiberglass requires specialized lifting equipment.
- DIY installation can save 40-50% on costs, with potential savings being greater for vinyl liner pools than fiberglass.
- Fiberglass pools provide faster installation time but less flexibility in design compared to vinyl liner options.
- Both types require extensive site preparation, permits, and adherence to local building codes regardless of DIY approach.
- Vinyl liner pools have more room for DIY error correction, whereas mistakes with fiberglass installation can be catastrophically expensive.
Understanding Vinyl Liner and Fiberglass Pool Construction Basics

When commencing a DIY inground pool project, you’ll need to understand the fundamental differences between vinyl liner and fiberglass pool construction methods. These two pool types require distinct installation methods and varying levels of expertise.
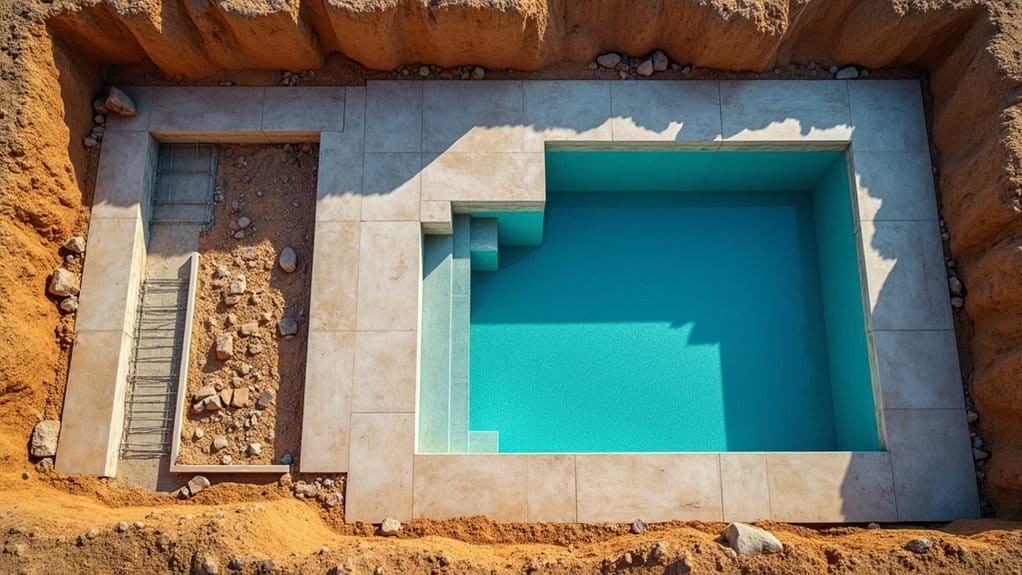
Vinyl liner pools feature a flexible membrane stretched over a structured wall system, typically made of steel, polymer, or concrete blocks. You’ll need to excavate precisely, install wall panels, pour a concrete footer, and carefully attach the liner without wrinkles or gaps.
Fiberglass pools arrive as a single, pre-manufactured shell that you’ll lower into an excavated hole. The installation involves creating a level base, managing drainage systems, and backfilling with the correct materials. While fiberglass offers quicker installation, you’ll need specialized equipment to lift and position the shell accurately. Once installed, fiberglass pools typically require less maintenance and are less prone to algae growth compared to their concrete counterparts. When considering which option to choose for your backyard oasis, it’s essential to compare fiberglass and concrete grounding, as each material presents its own benefits and drawbacks.
Cost Comparison: DIY Vs Professional Installation

Although professional pool installation typically costs between $35,000 and $65,000, a DIY approach can reduce these expenses by 40-50%. When planning your DIY budget, you’ll need to account for essential materials and equipment rental costs, while eliminating professional fees for labor and contractor markups.
Skip the pros and save up to half the cost of pool installation by going DIY instead of hiring contractors.
Key cost factors to evaluate when comparing DIY versus professional installation:
- Equipment rental: $2,000-$3,500 for excavator, compactor, and other machinery
- Materials: $15,000-$25,000 for liner/shell, plumbing, and concrete
- Permits and inspections: $500-$1,500 depending on location
- Professional consultation: $500-$1,000 for expert guidance during critical phases
You’ll save considerably on labor costs, which typically account for 35% of professional installation fees. However, keep in mind that mistakes during DIY installation can lead to expensive repairs, potentially offsetting your initial savings.
Required Tools, Equipment, and Technical Skills

Successfully completing a DIY inground pool installation requires a thorough set of specialized tools, heavy machinery, and practical construction skills.
Your tool selection must include an excavator, laser transit level, compactor, plumbing tools, concrete finishing equipment, and a range of hand tools like shovels and rakes. You’ll need access to a dump truck for soil removal and material delivery. Before starting, conduct a skill assessment to verify you’re comfortable with reading engineering plans, performing precise measurements, and managing complex excavation work.
Essential technical abilities include understanding soil mechanics, drainage systems, plumbing connections, and electrical work. You must also be proficient in operating heavy machinery and coordinating with local utility companies for underground clearance. Consider renting specialized equipment and taking relevant training courses if you lack specific skills.
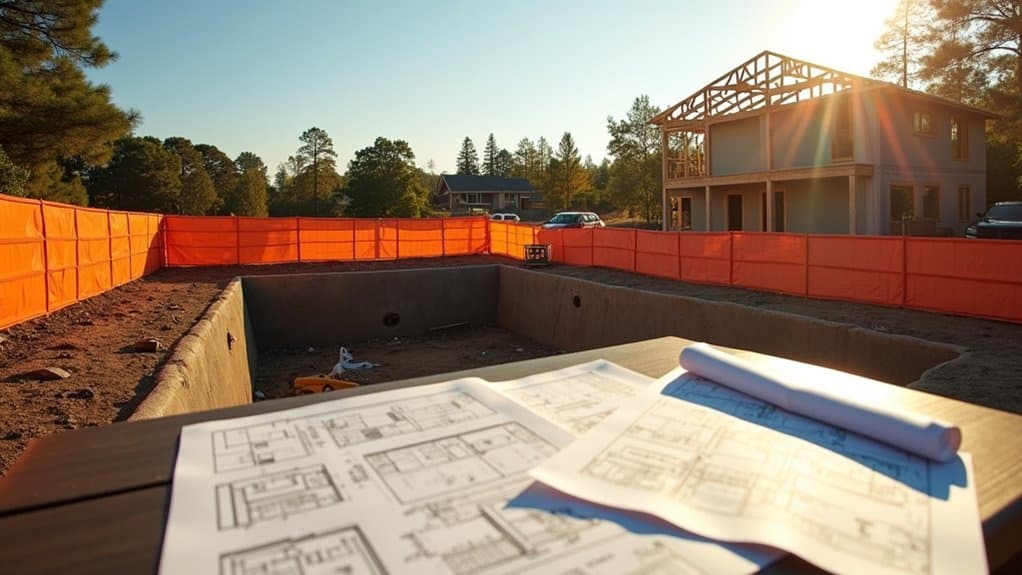
Site Preparation and Local Building Regulations
Before breaking ground on your DIY pool project, you must thoroughly research and comply with local building codes, zoning laws, and permit requirements. A detailed site assessment will determine your property’s suitability for an inground pool installation.
Your site preparation checklist should include:
- Underground utility mapping and marking through your local utility companies
- Soil composition testing to evaluate stability and drainage capabilities
- Property line verification and setback measurements according to zoning restrictions
- Topographical survey to identify grade changes and potential drainage issues
Contact your municipality’s building department to obtain specific regulations regarding pool depth, safety barriers, and equipment placement. You’ll need to submit detailed plans showing pool location, dimensions, and safety features. Many jurisdictions require professional engineering approval before issuing permits, even for DIY installations.
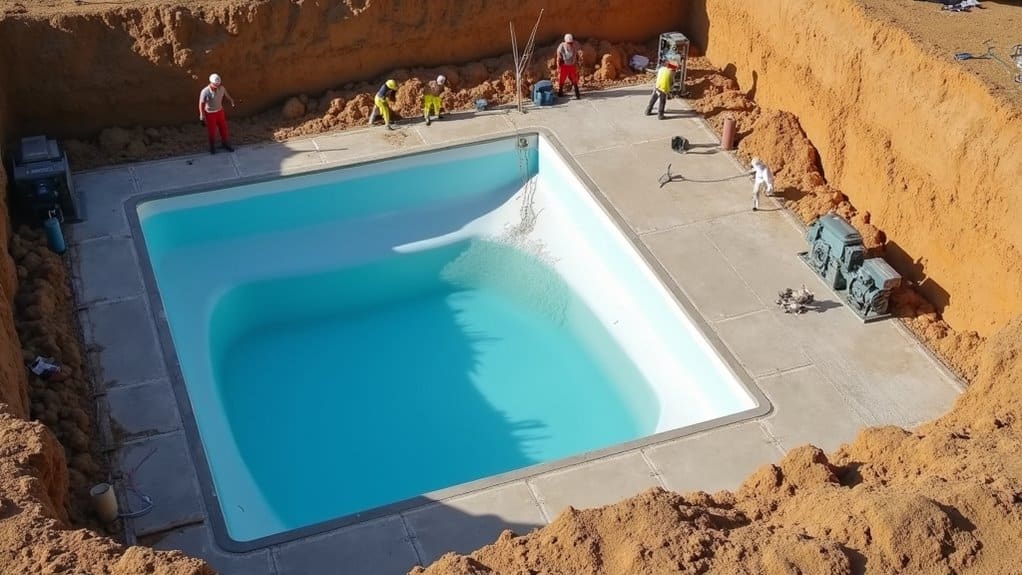
Common Installation Challenges and Risk Assessment
Installing an inground pool presents numerous technical challenges that can impact both safety and project success, even with proper permits and site preparation in place. You’ll need to carefully assess risk factors such as soil stability, underground utilities, and water table levels before proceeding with any installation techniques.
Common challenges include maintaining precise excavation depths, ensuring proper wall bracing, and managing groundwater seepage during construction. You’re also likely to encounter issues with plumbing connections, equipment placement, and maintaining correct pool shell leveling throughout the process. Weather conditions can considerably affect concrete curing times and liner installation.
Critical risk factors include structural failure from improper backfilling, damage to existing utility lines, and potential cave-ins during excavation. You’ll need specialized equipment and extensive knowledge of construction safety protocols to mitigate these dangers effectively.
Long-Term Maintenance and Durability Considerations
Once you’ve completed your DIY inground pool installation, proper maintenance becomes essential for maximizing its lifespan and structural integrity. Long-term durability depends heavily on implementing consistent maintenance practices and monitoring critical components.
Your maintenance schedule should include these essential tasks to guarantee peak performance:
- Weekly chemical balance testing and adjustment to prevent liner deterioration or shell damage
- Monthly inspection of structural components, including walls, floor, and coping for early detection of potential issues
- Quarterly assessment of filtration system efficiency and backwashing requirements
- Bi-annual evaluation of pool equipment, including pumps, heaters, and automation systems
You’ll need to maintain proper water chemistry, conduct regular inspections, and address repairs promptly to protect your investment. Understanding these maintenance requirements before installation helps you prepare for the ongoing commitment of pool ownership.
Frequently Asked Questions
Can I Convert My Existing Vinyl Liner Pool to Fiberglass?
While vinyl conversion to fiberglass is technically possible, it’s not recommended due to complex structural requirements. You’ll need to completely remove your existing vinyl liner pool, modify the excavation, and guarantee proper support for the fiberglass shell. Despite fiberglass benefits like durability and low maintenance, the conversion cost often exceeds the price of a new fiberglass pool installation. Consider replacing your vinyl liner instead of attempting this challenging conversion.
How Long Does It Take to Complete a DIY Pool Installation?
You’ll need to plan for a 2-4 week timeline for a complete pool installation, depending on weather conditions and project complexity. The excavation duration typically takes 2-3 days with proper equipment. Plumbing and electrical work require 3-4 days, while shell installation or liner fitting needs 2-3 days. Extra time is necessary for concrete deck pouring, curing, and final landscaping. Permit approvals and inspections can extend this timeline.
What Happens if I Hit Underground Utilities During Excavation?
Hitting underground utilities can be catastrophic, leading to service disruptions, costly repairs, and potential injuries. You must call 811 (Call Before You Dig) at least 3 business days before excavation. They’ll mark utility locations with color-coded utility markings on your property. If you do hit a line, stop work immediately, evacuate the area, and call the utility company. Never attempt repairs yourself – it’s dangerous and illegal. Proper excavation safety planning prevents these emergencies.
Will a DIY Pool Installation Affect My Home Insurance Rates?
Yes, any pool enhancement will impact your home insurance rates, but DIY installations carry extra insurance implications. You’ll need to boost your liability coverage and may face higher premiums due to raised risk factors. Some insurers might even decline coverage or require professional certification of your work. It’s essential to notify your insurance provider before starting the project and understand that improper installation could void your policy entirely.
Can I Install a Pool on Sloped Terrain Myself?
Installing a pool on sloped terrain presents significant installation challenges that you shouldn’t tackle alone. You’ll need extensive excavation work, retaining walls, and precise engineering calculations to guarantee structural stability. The slope’s grade will determine necessary drainage systems and soil reinforcement requirements. Professional surveying and permits are essential, as incorrect installation could lead to pool collapse or property damage. It’s strongly recommended to hire experienced contractors for sloped terrain pool projects.