

Vinyl liner pool construction follows a precise sequence you’ll need to execute correctly. You start by excavating the site 30 inches beyond the finished perimeter, then bolt 14-gauge galvanized steel wall panels together on the over-dig ledge. Next, you pour a continuous concrete footing to lock panels in place, trowel the pool floor smooth with a vermiculite base mix, and snap the vinyl liner’s bead around the perimeter under vacuum pressure. Each phase below breaks down the exact specifications and techniques you’ll need.
Excavate and Prep the Vinyl Liner Pool Site
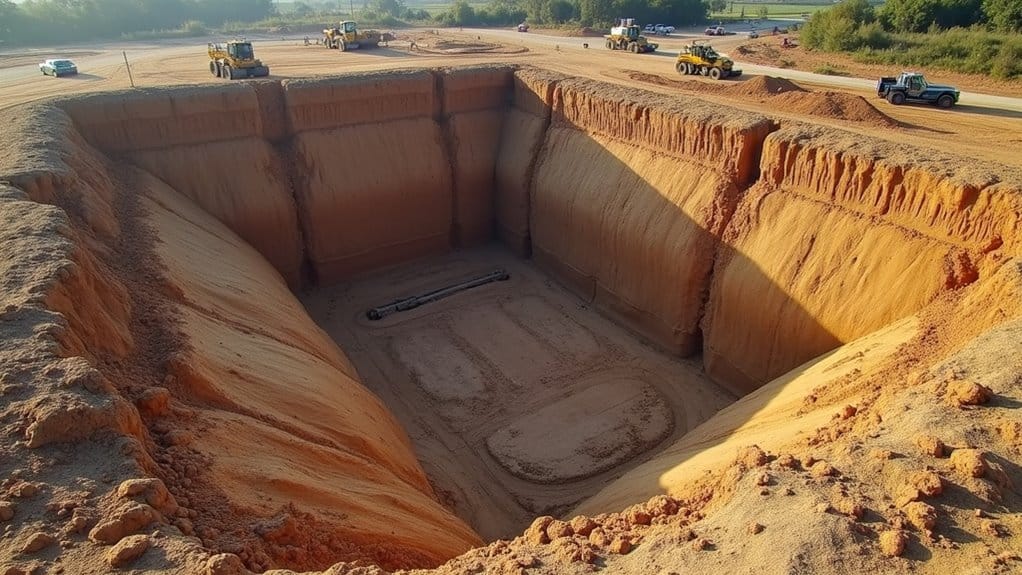
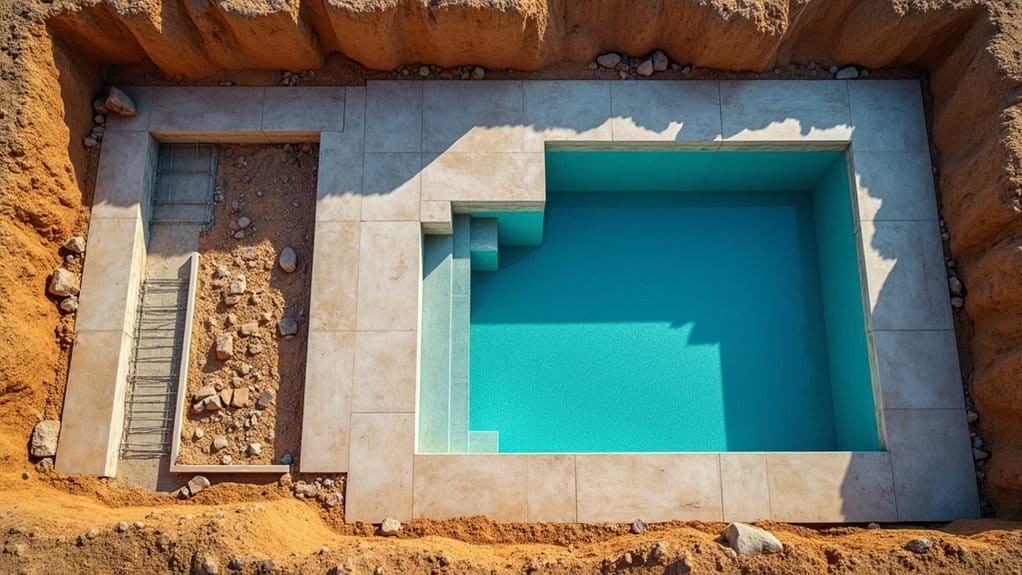
Before any walls go up or liner goes in, the excavation phase sets the foundation for the entire pool structure. During pool excavation and ground preparation, you’ll dig the hole 30 inches larger than the finished perimeter, allowing a 6-inch interior lip for formwork. The hopper gets excavated 9, 12 inches deeper than the finished depth to accommodate surfacing material. You’ll use a laser or transit to identify the highest point, then shim from the opposite end to achieve a level working shelf. Squaring is verified against pool prints and adjusted before proceeding. This excavation phase typically takes 1, 2 days to complete before crews can move on to wall panel assembly. Once grading is complete, pool base sand installation begins, sand or vermiculite is troweled across the floor, filling voids and creating the smooth surface your vinyl liner requires.
Bolt Together the Steel Wall Panels
Steel wall panels form the rigid skeleton of your vinyl liner pool, and assembling them correctly determines the structural integrity of the entire build. You’ll position 14-gauge galvanized panels on the over-dig ledge, interlocking them per manufacturer specifications to create your steel wall vinyl pool structure.
Align the step unit relative to the wall panels before clamping it in place. Use the wall flange holes as a drilling template for matching step flange holes. During the bolting process, insert steel bolts with oversized washers on the step side of each flange assembly. Secure braces with H 3991 Tech self-drilling screws, staking them into the ground. Install two screws at the top and bottom of each brace. Verify level positioning front-to-back and side-to-side before proceeding.
Pour the Concrete Footing to Lock Panels in Place
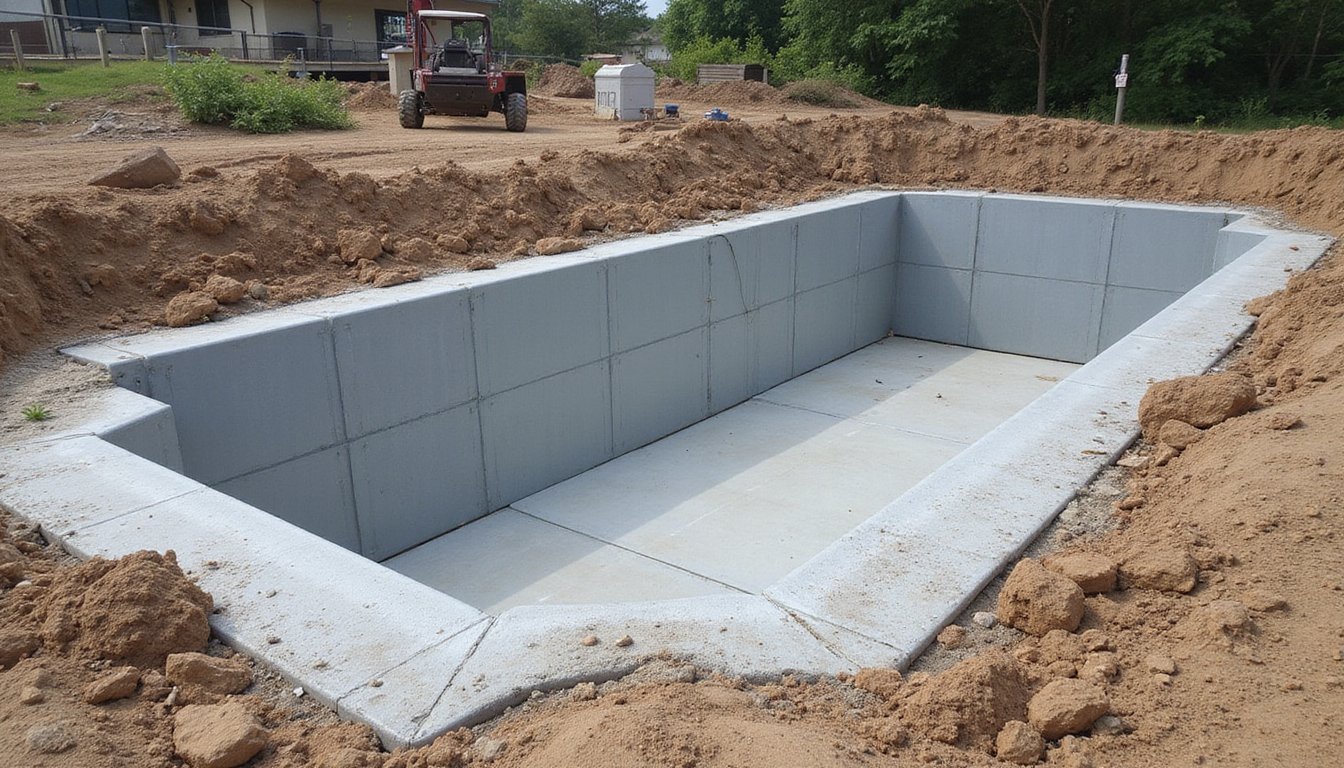
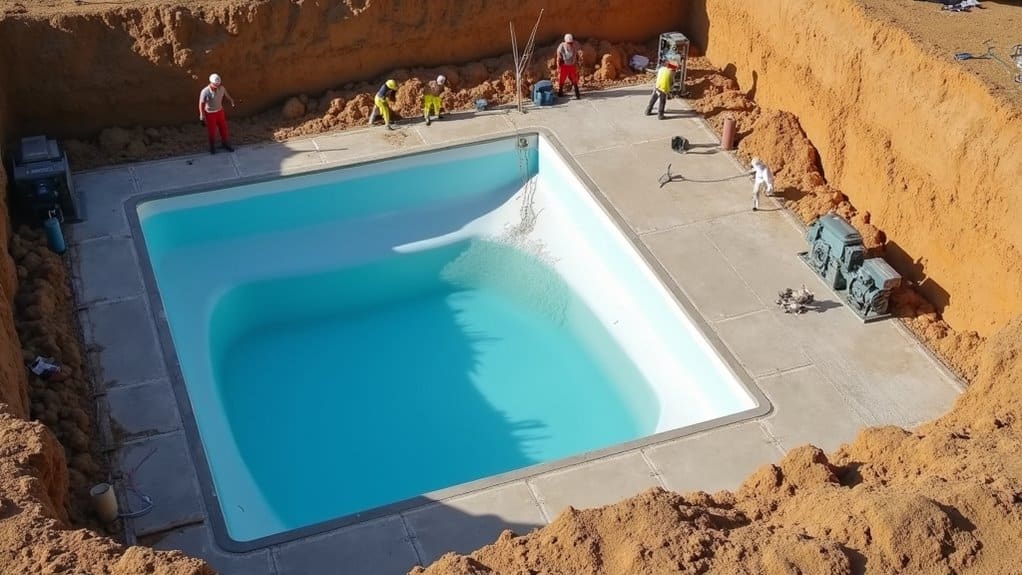
Lock your assembled steel wall panels permanently into the ground by pouring a continuous concrete footing around the pool’s entire perimeter. Use minimum 2500 PSI concrete with ¾-inch stone aggregate, poured 5 to 8 inches deep and at least 30 inches wide. This structural collar is critical to the vinyl liner pool construction process, preventing panels from bowing or shifting over time. For homeowners looking to enhance their outdoor spaces, construction loans for home improvements can provide the necessary funding. These loans can help cover costs related to upgrades such as landscaping, patios, or additional structures.
Place concrete gently behind walls, never direct the flow against panels. Concentrate extra material at A-frames and corners for reinforcement. Pour the shallow end bottom simultaneously with the collar for uniform distribution. Before pouring, always verify that inlet fittings and skimmers along with light housings and tie placements are properly positioned to avoid costly rework. This step typically takes half a day, scheduled on days 3, 4 after pool wall panel assembly completion. Allow the footing to cure fully before proceeding, then inspect for levelness and structural stability.
Smooth the Vinyl Liner Pool Floor With Base Material
Once your wall panels are locked into the concrete footing, you’ll prepare the pool floor by mixing your chosen base material, whether sand-cement, vermiculite-Portland cement, or a pre-blended product like Pool Krete, to the manufacturer’s specified consistency. You spread the mixture across the excavated floor and trowel it smooth with a round-edged trowel, eliminating any ridges, divots, or debris that could telegraph through the vinyl liner. The goal is a uniformly hard, level surface that protects the liner from punctures and provides the adhesion needed to resist wash-outs over the pool’s lifetime.
Mixing Base Materials
Spread a base material over the exposed soil to create a smooth, protective foundation beneath the vinyl liner. For vinyl liner pool floor shaping, you’ll typically choose between vermiculite, perlite, or grout-based compounds. Vermiculite mixes with Portland cement for pool base applications, producing a semi-hard surface that feels slightly spongy underfoot and insulates effectively.
Purchase vermiculite aggregate in 4-cubic-foot bags and mix with water on-site using paddle-type mixers. Load the blended material into buckets and dump it directly into the pool’s base area. Screed the mixture to the proper contour at a recommended thickness of 1 to 2 inches. Keep the surface moist by fog spraying every 15 minutes during application. Fill the pool immediately after placement to prevent dimpling and guarantee a wrinkle-free liner fit.
Troweling the Surface
After the base material is screeded to contour and is still workable, grab a 16-inch pool trowel and begin smoothing the surface to eliminate ridges, voids, and inconsistencies. You’ll want to achieve a flat, even plane that supports accurate vinyl liner measurement and fitting later.
Work methodically using these techniques:
- Shave high spots and fill low areas with the trowel edge to maintain a consistent 1½-inch minimum thickness.
- Define changes between deep end walls, hopper slopes, side slopes, and the shallow end with clean, sharp lines.
- Bring material up hopper walls to the set string height, rounding edges to prevent liner damage.
Trowel out crumbs as you work, debris trapped beneath the surface becomes visible after installation. A precise floor directly impacts the vinyl liner sealing process and long-term performance.
Snap In and Vacuum-Fit the Vinyl Liner
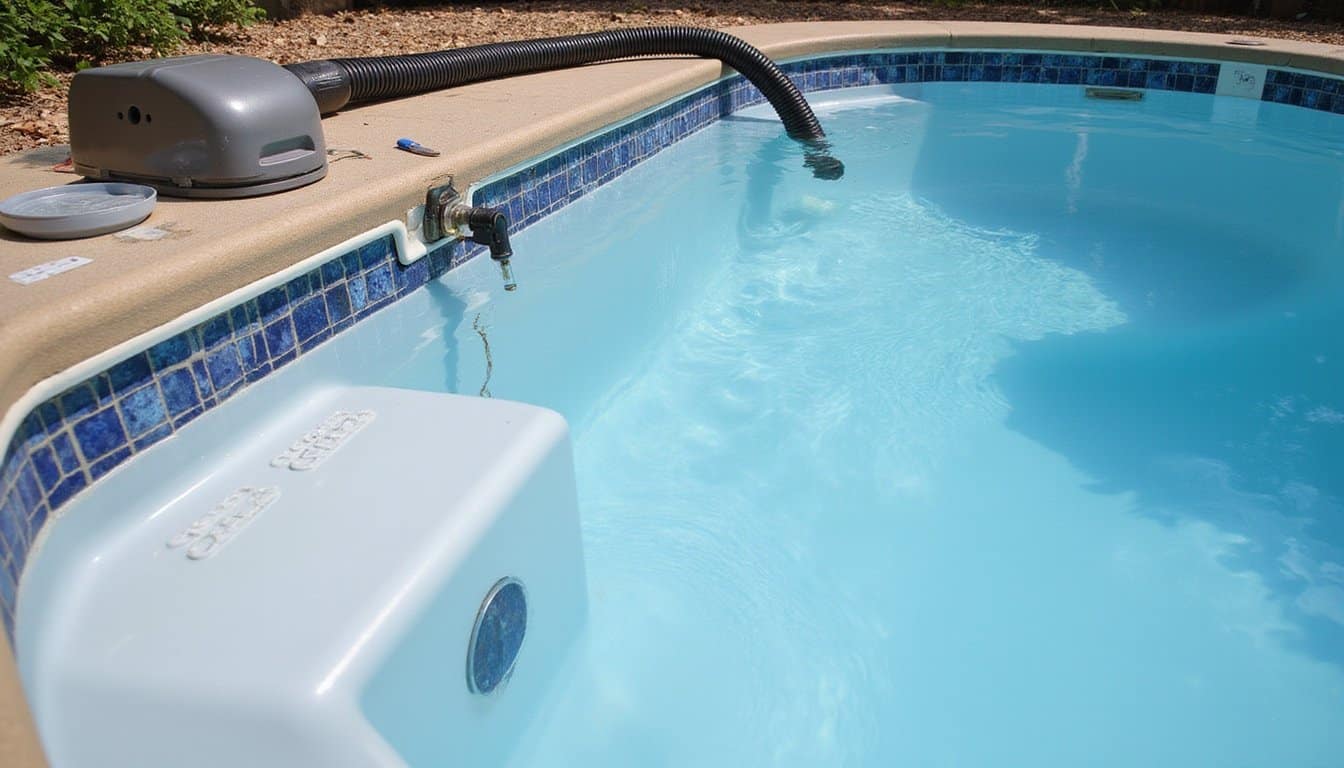
Positioning the liner bead into the wall track requires methodical technique and coordination between at least two installers. During vinyl liner swimming pool installation, you’ll begin insertion at the deep end corners to establish firm anchor points. Both installers then work from opposite directions, starting at the shallow end center, pulling simultaneously to eliminate slack.
| Step | Action |
|---|---|
| Bead insertion | Lock the bead snugly around the entire perimeter |
| Fit adjustment | Insert Liner Lock rubber wedge strips where needed |
| Vacuum setup | Position 5+ HP shop vacuum at the midpoint of the long wall |
| Hose placement | Run the hose behind the liner approximately one foot above the floor |
| Air removal | Maintain suction until water reaches 6 inches above the floor |
The liner vacuum installation method uses duct tape to temporarily secure the hose entry point until water covers that location.
Install Plumbing, Jets, and Lights in Your Pool
Once your liner has settled and the shallow end holds 12, 18 inches of water, you’ll install the skimmer gaskets, faceplates, and return fittings using new hardware and gasket cement to guarantee watertight seals. You’ll tighten each faceplate’s screws firmly, until the plastic begins to creak on drain installations, then use a utility knife to cut out the liner material inside each opening. After all plumbing fixtures are secured, you’ll run electrical wiring for the pool light and complete the equipment bonding connections required by code to protect swimmers from electrical faults.
Skimmer and Jet Installation
Because the structural walls and plumbing lines are already in place, skimmer and jet installation becomes the critical step that connects your pool’s circulation system to the vinyl liner envelope. During skimmer and return line installation, you’ll drill 7/32″ holes at marked mounting locations and secure the skimmer face to wall panels using pan head screws.
Your pool filtration system setup depends on precise gasket alignment. Position the primary gasket by matching tabs with skimmer face slots, then apply light silicone adhesive to maintain placement during liner installation.
Key mounting specifications include:
- Flange spacers retained for metal panels but removed for foam or wood panels measuring 11/16″ to 3/4″ thick
- Stainless steel screws penetrating face plate, gasket, liner, second gasket, and skimmer face
- Tightening protocol requiring compression until plastic creaks to prevent leaks
Electrical Wiring and Bonding
With your skimmers and return jets mechanically fastened and sealed, the next priority shifts to electrical wiring and bonding, the systems that power your pool equipment and protect swimmers from shock hazards. Completing your pool plumbing system installation before wiring prevents conduit conflicts and streamlines trenching.
Run #12 AWG minimum insulated copper wire through PVC conduit buried 18 inches deep to your pump motor. Install a single-outlet, GFCI-protected receptacle 6, 10 feet from the pool wall with a weatherproof cover on a dedicated circuit.
For electrical wiring and bonding, connect all metal components within 10 feet of the pool using #8 bare copper wire in a continuous loop, positioned 18 inches below coping. Bond ladders, rails, diving boards, and equipment to the ground bus bar using non-corrosive clamps.
How Long Does Vinyl Liner Pool Construction Take?
A standard vinyl liner pool moves from groundbreaking to swim-ready in roughly three to four weeks, significantly faster than concrete pools, which often require eight to twelve weeks. Your residential vinyl liner pool building steps break down into distinct phases that determine overall duration. Budget planning for custom swimming pools is an essential step to ensure that you’re not only meeting your design goals but also staying within your financial limits. It’s important to consider all factors, including materials, labor, and any additional features you may desire.
From groundbreaking to swim-ready in just three to four weeks, vinyl liner pools deliver backyard transformation at remarkable speed.
- Excavation and site prep: 2, 5 days depending on soil conditions and design complexity
- Wall assembly and plumbing: 1, 2 days for panel installation and pipe routing
- Liner installation and filling: 4, 6 labor hours for professional crews, plus 1, 2 days for water fill
Permits, weather, and environment enhancements can extend timelines by two weeks or more. Understanding vinyl liner pool maintenance considerations early, particularly water chemistry requirements, ensures you’re prepared to protect your investment immediately after construction wraps. Best practices for pool planning should involve thorough research on the types of materials that suit your climate.
Ready to Transform Your Backyard?
Your dream pool is closer than you think. At Schiller Pools, our experienced team brings over 40 years of expertise to every project, delivering stunning fiberglass pool installations and custom pool construction that turn ordinary backyards into extraordinary outdoor retreats. With flexible financing options and lifetime warranty backing, there has never been a better time to get started. Call (561) 475-5997 today for your free estimate.
Frequently Asked Questions
How Thick Should a Vinyl Pool Liner Be for Best Durability?
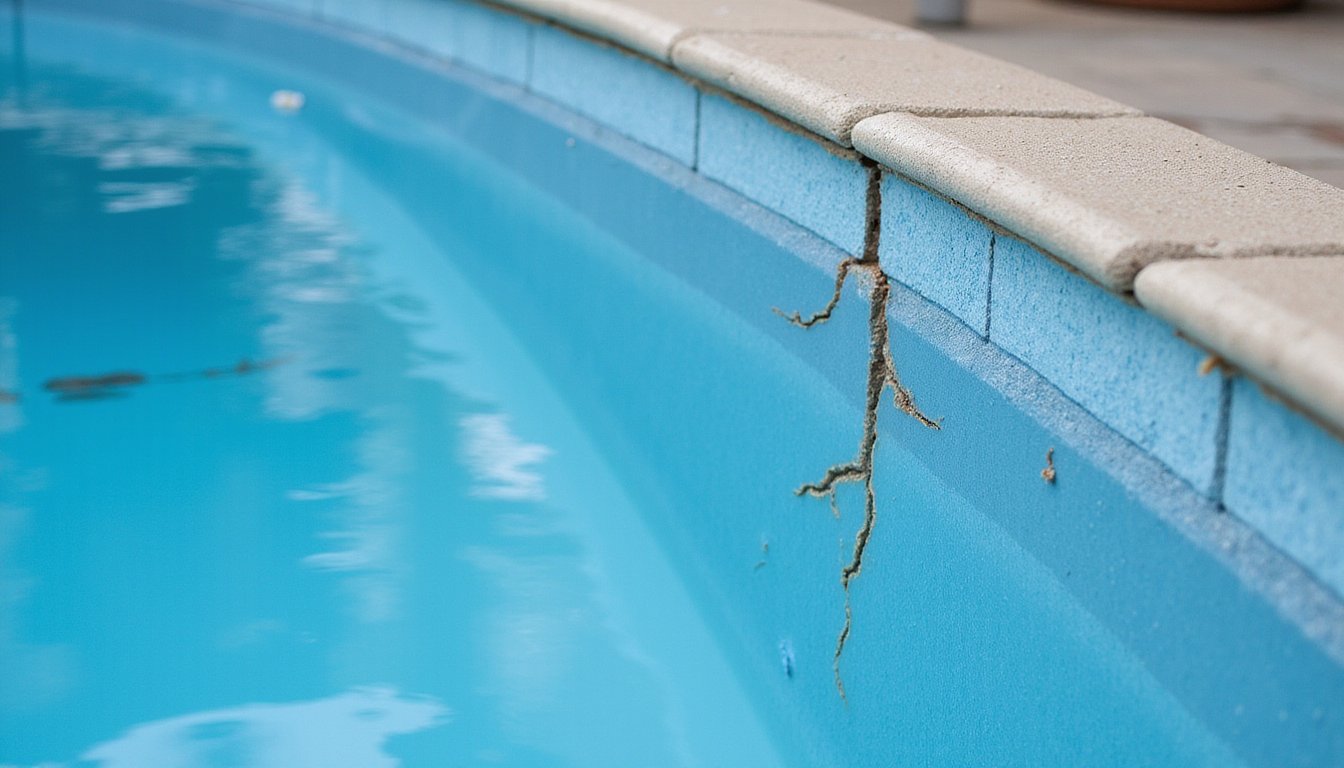
You should choose a liner between 20 and 30 mils thick, but don’t assume thicker automatically means better durability. A 20-mil liner provides sufficient strength under water weight and fits corners more precisely due to its pliability. Thicker liners (27, 30 mil) offer greater puncture resistance against debris and claws. However, proper installation and balanced water chemistry, chlorine at 1, 3 ppm, pH between 7.2, 7.8, impact longevity far more than thickness alone.
What Chlorine and pH Levels Protect a Vinyl Liner From Damage?
You’ll protect your vinyl liner by maintaining free chlorine between 1.0 and 3.0 ppm and keeping pH within 7.2 to 7.6. Chlorine exceeding 5.0 ppm bleaches and weakens the vinyl’s polymer bonds, while pH dropping below 7.0 accelerates corrosion at bead track attachment points. You should also maintain alkalinity at 80, 120 ppm to buffer pH fluctuations. Test weekly and adjust incrementally, this balanced approach extends liner life by 7, 10 years.
How Many Years Does a Vinyl Pool Liner Typically Last?
Your vinyl pool liner will typically last 8 to 12 years when you maintain proper water chemistry and routine care. However, several factors directly influence this range. Sun exposure in southern climates can reduce lifespan by 1, 3 years, while cooler regions with seasonal covers may extend lifespan considerably. Premium liners receiving excellent maintenance can reach up to 20 years. You’ll maximize longevity by keeping chlorine between 1, 3 ppm and pH within 7.2, 7.8.
How Much Does It Cost to Replace a Vinyl Pool Liner?
You’ll typically spend between $4,000 and $7,000 to replace a vinyl pool liner, with most homeowners averaging around $4,500. Your total breaks down into labor (about 40%), liner material (35%), and additional costs like water refill ($450, $2,000), chemicals ($50, $150), and potential base repairs ($400, $1,800). Pool size directly drives pricing, a standard 16×32 pool runs $2,800, $6,500, while smaller 12×24 pools cost $1,500, $3,000.
What Size PVC Pipes Are Used for Vinyl Liner Pool Plumbing?
You’ll typically use 1.5-inch to 2-inch Schedule 40 PVC pipes for vinyl liner pool plumbing. A 1.5-inch pipe handles approximately 44 GPM, while a 2-inch pipe manages around 78 GPM, matching the 40 to 70 GPM circulation most residential pools require. For new installations, you should opt for 2-inch lines on suction and return sides to maximize flow efficiency and accommodate energy-efficient variable-speed pumps. Always match your pipe diameter to your pump’s specifications.