
To repair a fiberglass pool filter, you’ll start by identifying cracks through visual inspection and water-loss testing. Clean the damaged area with gentle pressure washing, then let it dry completely. Mix a two-part epoxy like West System 105 and apply it directly into the crack using a plastic knife, feathering the edges smooth. Allow a full 72-hour cure at 70, 75°F before water exposure. Each step below breaks down the exact techniques you’ll need.
Spot the Crack on Your Fiberglass Filter Early
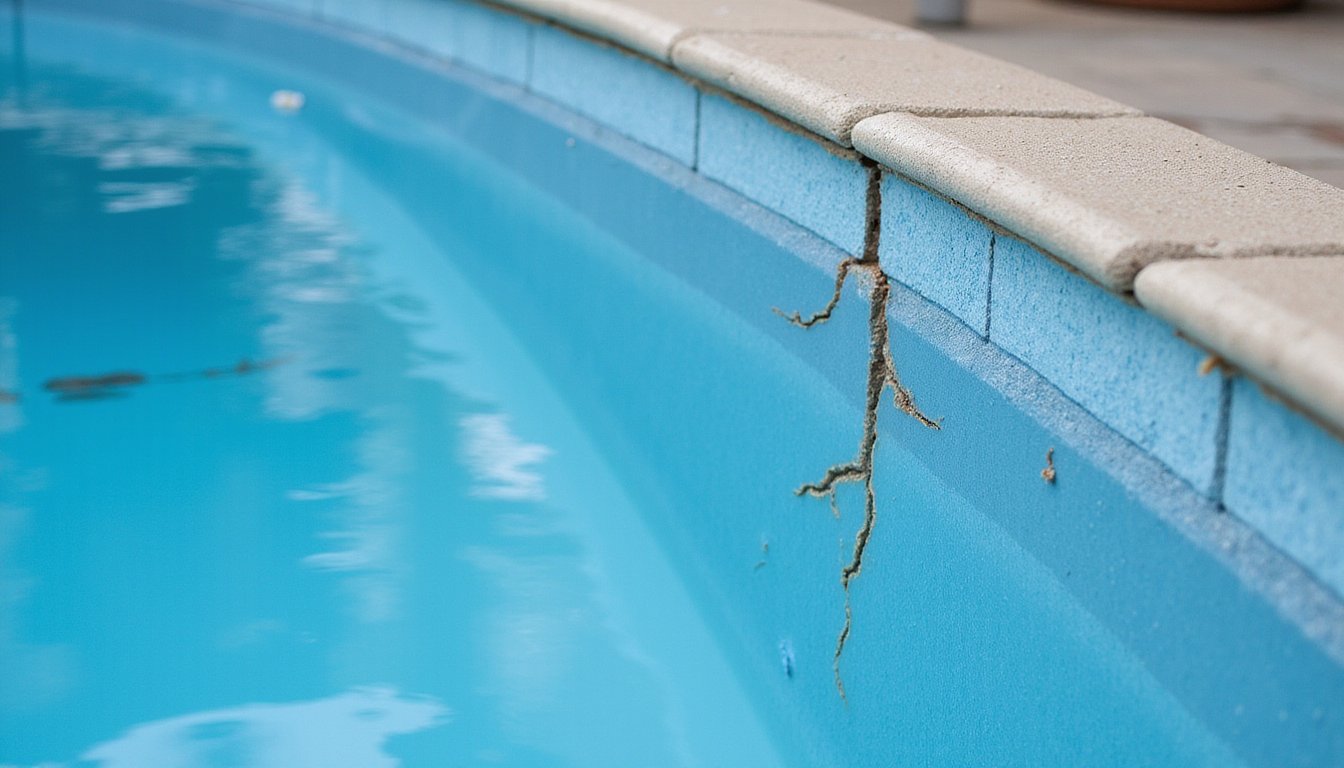
Catching a crack early on your fiberglass pool filter can mean the difference between a simple patch job and a costly full tank replacement. Watch for early detection signs like spider cracks in the gelcoat layer, unexplained water loss, or unusual vibrations during pump cycles. Repairing fiberglass pool cracks effectively can prevent further damage and save you money in the long run. Regular maintenance and timely repairs are essential to ensure the longevity of your pool.
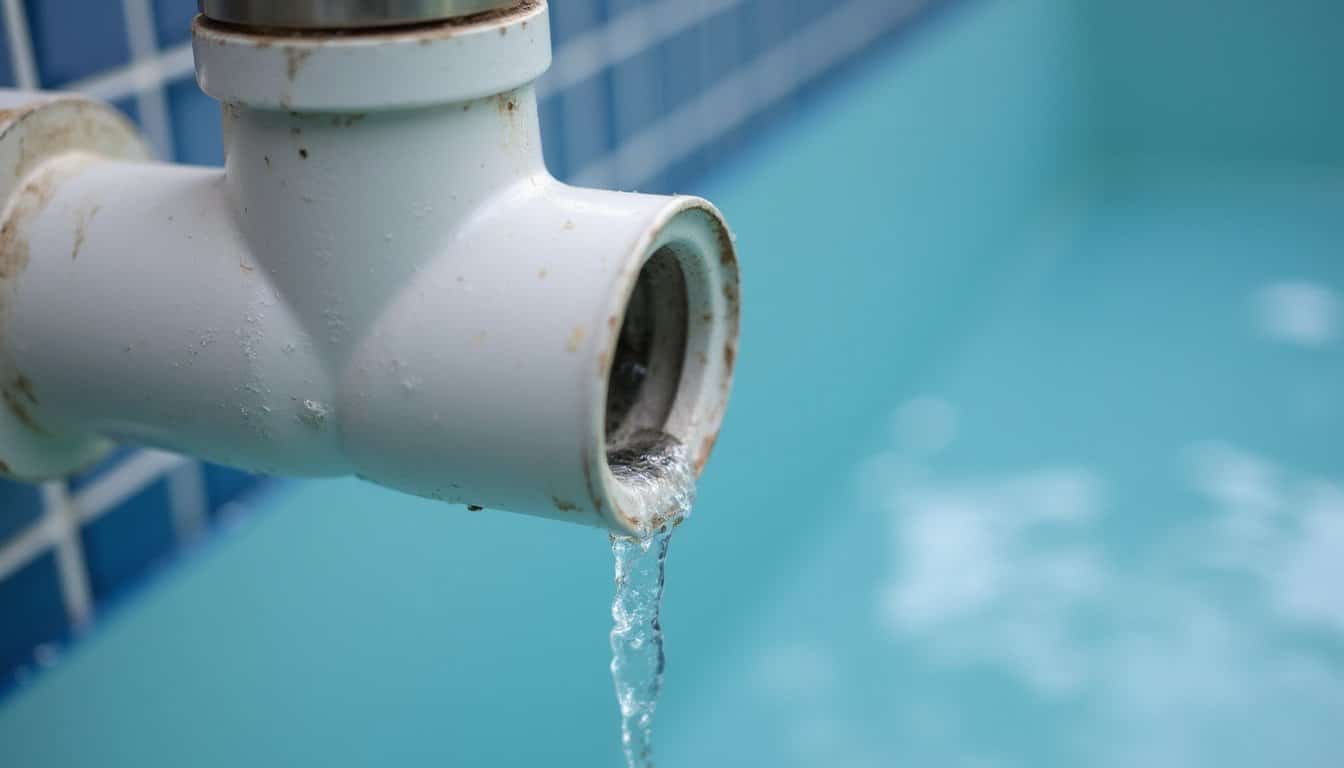
To confirm damage, run a bucket test, compare pool water loss against a filled bucket over 24 hours. If your pool loses more water than evaporation accounts for, inspect the filter tank’s base and plumbing penetrations where cracks commonly form. You should also inject dye near suspect areas using a syringe to pinpoint exact leak locations. Identifying these issues promptly makes fiberglass pool filter tank repair straightforward and prevents dangerous pressure failures. Once you’ve located a crack, determine the size of it carefully, since small cracks may be repairable with sealant while large cracks may require a complete filter replacement.
Decide Whether to Repair or Replace the Filter
Once you’ve identified a crack or leak on your fiberglass filter tank, you’ll need to determine whether a targeted repair makes sense or if full replacement is the smarter investment. Evaluate the filter’s age first, tanks exceeding 10 years often have age-related degradation that makes fiberglass filter tank reinforcement unreliable long-term.
Assess damage severity next. Small hairline cracks near fittings respond well to pool filter pressure leak repair techniques. However, structural cracks, heavy rust, or multiple failure points signal replacement is risky since the remaining material shares identical wear. Repairing only one section of a compromised tank is risky since the remaining material shares identical wear.
Factor in performance decline. If you’re experiencing persistent cloudy water, weak jets, or rising pressure despite cleaning, your filter’s efficiency has deteriorated beyond what repairs can restore. Replace proactively to protect connected equipment. Scheduling regular professional service can help detect early signs of damage before they escalate into costly replacements.
Clean and Prep the Cracked Filter Surface
Once you’ve decided the filter is worth repairing, you’ll need to locate the exact crack and assess its boundaries so you know how much surface area to prepare. Clean the damaged zone and surrounding fiberglass thoroughly using gentle pressure washing, bleach treatment, and light sanding to remove debris, organic growth, and loose material that would prevent a solid bond. Since fiberglass has a smooth, non-porous surface, you should avoid abrasive tools and harsh cleaners that could damage the gel coat finish beyond the existing crack. After the final wash with Dawn dish soap and water, let the entire prepped surface dry completely before moving on to the fiberglass repair.
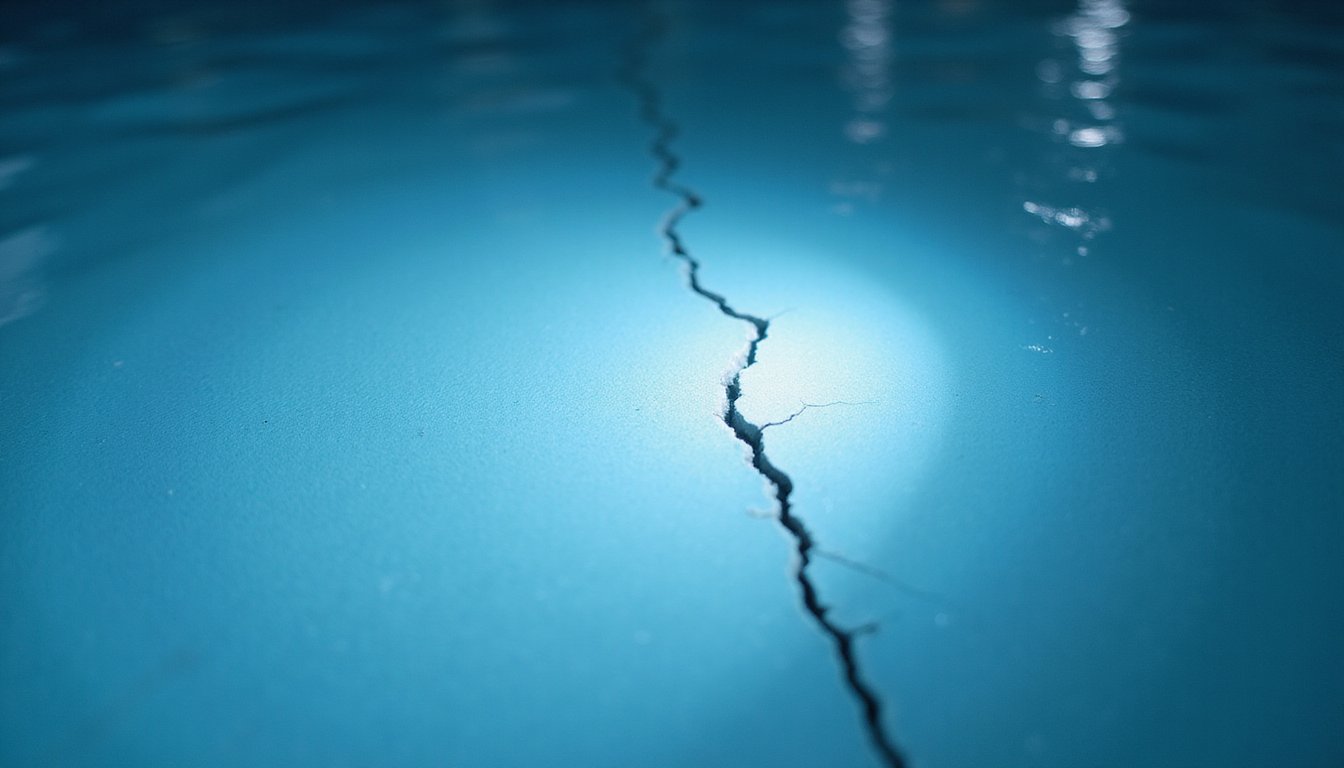
Identify the Crack
Perform a thorough crack assessment by distinguishing flexible stress cracks from rigid structural breaks. Measure each crack’s length and depth using a ruler or caliper, and determine whether damage penetrates the gelcoat into underlying fiberglass layers. Press gently around each crack to check for delamination or soft spots. Document all findings with photos before proceeding, this record guides your repair approach and helps you select appropriate materials.
Clean Around Damage
Wipe down the entire area surrounding each identified crack using a soft, lint-free cloth dampened with a mild cleaner formulated for pool equipment surfaces. This step guarantees proper adhesion during pool filter housing crack repair by eliminating contaminants that compromise bonding strength.
Follow these surface preparation essentials before epoxy repair for fiberglass filter tanks:
- Remove all dirt and debris within the immediate perimeter of each crack
- Use gentle wiping motions to avoid enlarging existing damage
- Avoid high-pressure water or compressed air on weakened areas
- Dry cleaned surfaces completely using a hairdryer or extended air drying
- Verify no residual moisture remains in cracks or crevices by touch assessment
Don’t proceed with epoxy application until you’ve confirmed the surface is completely dry and contaminant-free.
Dry Surface Completely
After cleaning the area surrounding each crack, you’ll need to eliminate every trace of moisture before moving to surface preparation. Use a hairdryer to dry the surface thoroughly across the exposed fiberglass substrate. Target ambient conditions between 65°F and 85°F, which provide ideal evaporation rates without causing adhesion failures.
At approximately 70°F, you’ll achieve perfect conditions for removing residual moisture, dust, and oil films. Don’t rush this step, any trapped moisture beneath your fiberglass filter tank patch repair will compromise resin bonding and cause delamination under pressure.
Perform a condensation test to confirm the substrate’s completely dry and ready for abrasion. Verify the exposed area remains free of contaminants throughout the drying process, as even minor moisture pockets can weaken structural integrity during curing.
Pick the Right Epoxy for Fiberglass Filter Repair
Because fiberglass filter tanks operate under constant water pressure and chemical exposure, selecting the right epoxy formulation directly determines whether your repair holds or fails prematurely.
For filter tank structural repair techniques, epoxy resin outperforms polyester alternatives in adhesion and water resistance. Consider these proven options:
- West System 105 Epoxy Resin paired with 205 Fast Hardener for time-sensitive repairs
- Vinylester resin for superior water-blocking on high-moisture joints
- West System 206 Slow Hardener for complex, large-surface applications
- Thickened epoxy formulations like West System 610 for gap-filling near fittings
- Two-part epoxy systems for reliable bonding during pool filter gasket replacement
You’ll want water-resistant formulations specifically tested for sustained aquatic environments to prevent future crack propagation.
Apply Epoxy to the Crack and Let It Cure
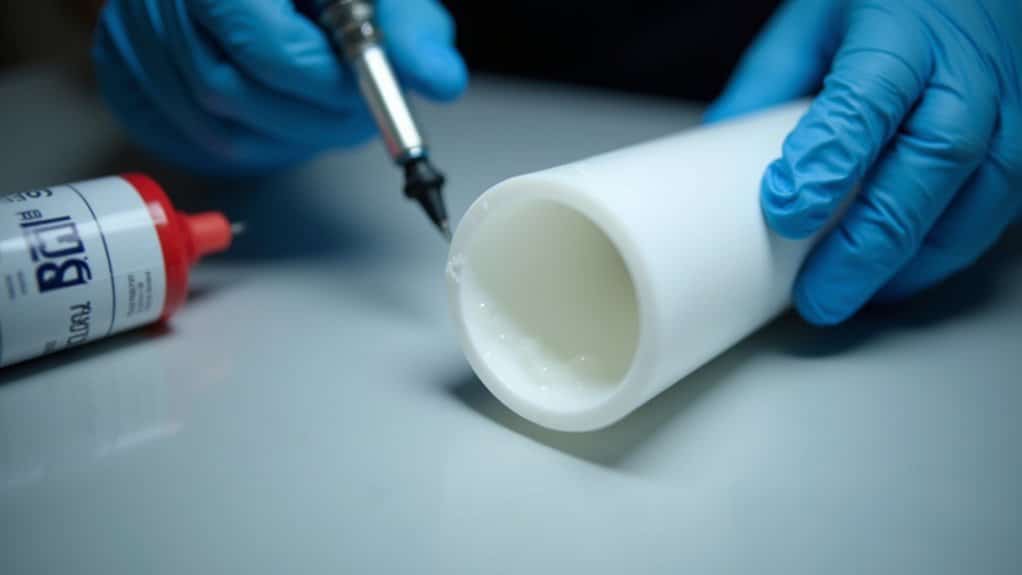
Once you’ve selected the correct epoxy, you’ll need to mix the two-part formula precisely, combining the resin with 1.5% catalyst and stirring thoroughly until the mixture reaches a uniform consistency. Using a plastic knife or wooden spatula, press the blended epoxy firmly into the prepared crack, spreading it in thin, even layers to guarantee full penetration and a smooth bond across the damaged surface. After application, allow the epoxy to cure for the manufacturer’s recommended time, typically around 40 minutes for initial set, followed by a full 7-day rest period before exposing the repair to water pressure.
Mix Two-Part Epoxy
Prepare your two-part epoxy by selecting a clean plastic or disposable mixing cup with volume markings, filling it no more than three-quarters full to allow for expansion during the mixing process. For fiberglass tank repair, measure five parts resin to one part hardener using metered pumps, guaranteeing full pump depression for accuracy.
Follow these critical mixing steps:
- Stir slowly for 3, 4 minutes, scraping sides and bottom to eliminate streaks
- Transfer to a second container and remix 1, 2 minutes for complete blending
- Mix until color appears uniform with no visible striations
- Let the mixture sit 1, 2 minutes so air bubbles rise before application
- Use small batches to prevent heat buildup during cure
Before applying epoxy, verify your pool filter o ring replacement fits properly to confirm a sealed system.
Apply To Crack
With your epoxy mixed and ready, you’ll want to work quickly, most two-part formulations begin setting within 15 to 30 minutes. Using a plastic knife, apply the resin directly to the crack in your fiberglass filter tank. Spread it evenly, pressing gently to fill the entire length without excess buildup. Feather the edges for a seamless blend with the surrounding surface, eliminating air pockets as you go. Choosing the right fiberglass pool paint is essential for ensuring durability and a great finish. Consider the type of pool environment, as some paints are better suited for warmer climates while others provide superior protection against harsh chemicals.
Once applied, position the filter stably and allow full cure time per manufacturer instructions, typically 12 to 24 hours. Protect the repair from moisture and dust during this period. Test hardness before returning the unit to service. For extensive damage beyond simple cracks, professional pool filtration equipment repair services can assess whether tank replacement is the safer option.
Allow Proper Drying
After you’ve applied the epoxy to the crack and positioned the filter stably, resist the urge to rush the curing process, proper drying time directly determines the repair’s structural integrity under pressure.
Follow these critical curing parameters for fiberglass pool equipment maintenance procedures:
- Touch-dry at 24 hours, don’t handle or stress the repair
- Full cure requires 72 hours minimum at 70, 75°F before water exposure
- Below 60°F, cure times extend dramatically, risking incomplete polymerization
- Avoid moisture contact during the entire curing window to prevent resin breakdown
- Don’t sand or finish until complete cure is verified
Maximum mechanical strength develops over 7 days. You’ll achieve functional durability at 72 hours, but waiting longer guarantees your fiberglass repair withstands continuous filtration pressure without failure.
Restore the Fiberglass Filter Finish With Paint
Sand the fiberglass filter surface with 120-grit sandpaper to create a roughened profile that’ll promote strong paint adhesion. Wipe away sanding dust with a tack cloth, guaranteeing no contaminants remain before coating. This pool equipment refurbishment step directly impacts finish durability. After ensuring the surface is properly prepared, you can utilize the fiberglass pool wall repair method as an effective way to address any imperfections. Following this approach will help ensure long-lasting results and enhance the overall appearance of your pool.
Apply oil-based paint in two light coats followed by one medium coat, waiting 5-10 minutes between applications for proper absorption. Spread the first coat thinly to prevent drips, keeping paint strictly on fiberglass areas while avoiding metal frame sections. This precision guarantees your swimming pool circulation system maintenance produces professional results.
Allow overnight curing for full hardening before handling the filter. Once cured, inspect the finish for uniform coverage and patch any remaining small cracks with pool-safe epoxy. This layered approach restores both structural integrity and weather resistance.
Ready to Transform Your Backyard?
Your dream pool is closer than you think. At Schiller Pools, our experienced team brings over 40 years of expertise to every project, delivering stunning fiberglass pool installations and custom pool construction that turn ordinary backyards into extraordinary outdoor retreats. With flexible financing options and lifetime warranty backing, there has never been a better time to get started. Call (561) 475-5997 today for your free estimate.
Frequently Asked Questions
How Often Should Sand Be Replaced Inside a Fiberglass Pool Filter Tank?
You should replace the sand inside your fiberglass pool filter tank every 3 to 5 years under normal operating conditions. If you’re noticing pressure readings 8 to 10 PSI above your baseline, cloudy water despite balanced chemistry, or debris passing through the system, you’ll need earlier replacement. Inspect your sand annually, maintain consistent backwashing every 1 to 2 weeks, and monitor water chemistry to maximize filtration media lifespan.
What Pressure Level Indicates a Fiberglass Pool Filter Needs Backwashing?
You should backwash your fiberglass pool filter when the pressure gauge reads 8 to 10 psi above your clean baseline pressure. Record your clean operational pressure immediately after each backwash, typically 10 to 15 psi for sand filters. If your gauge climbs from 12 psi to 22 psi, it’s time to backwash. Don’t let pressure exceed 30 psi, as this risks equipment damage or failure regardless of the rise interval.
Can Cracked Fiberglass Filter Tanks Be Safely Used Under Normal Operating Pressure?
You shouldn’t operate a cracked fiberglass filter tank under normal pressure. Cracks compromise the tank’s structural integrity as a pressure vessel, and continuous pressure cycling accelerates crack propagation, turning minor fractures into catastrophic ruptures. Manufacturers explicitly recommend replacing cracked housings rather than attempting repairs. Even small cracks weaken the entire vessel’s load rating unpredictably. You’ll want to depressurize immediately, assess the damage, and replace the tank to maintain safe filtration operation.
How Much Does a Replacement Fiberglass Pool Filter Tank Typically Cost?
You’ll typically spend between $320 and $1,200 on a replacement fiberglass pool filter tank, depending on the brand, model, and capacity. A partial housing replacement, like Waterway’s cartridge filter housing (part 515-4200), runs approximately $320, saving you up to two-thirds compared to a full unit replacement at $1,200. Before committing to a full tank swap, consider whether epoxy sealing or fiberglass patch kits can resolve smaller cracks at considerably lower cost.
What Routine Maintenance Prevents Structural Damage to Fiberglass Pool Filter Tanks?
You’ll prevent structural damage by inspecting your tank weekly for cracks, checking pressure gauge readings against baseline levels, and backwashing every 1 to 2 weeks to relieve internal stress. Lubricate O-rings with lithium grease to prevent cracking under pressure, and avoid over-tightening plugs or clamps that strip fiberglass threads. Replace filter media every 3 to 5 years, maintain balanced water chemistry, and replace the entire tank if cracks develop.